Getting Started
Signing in and out
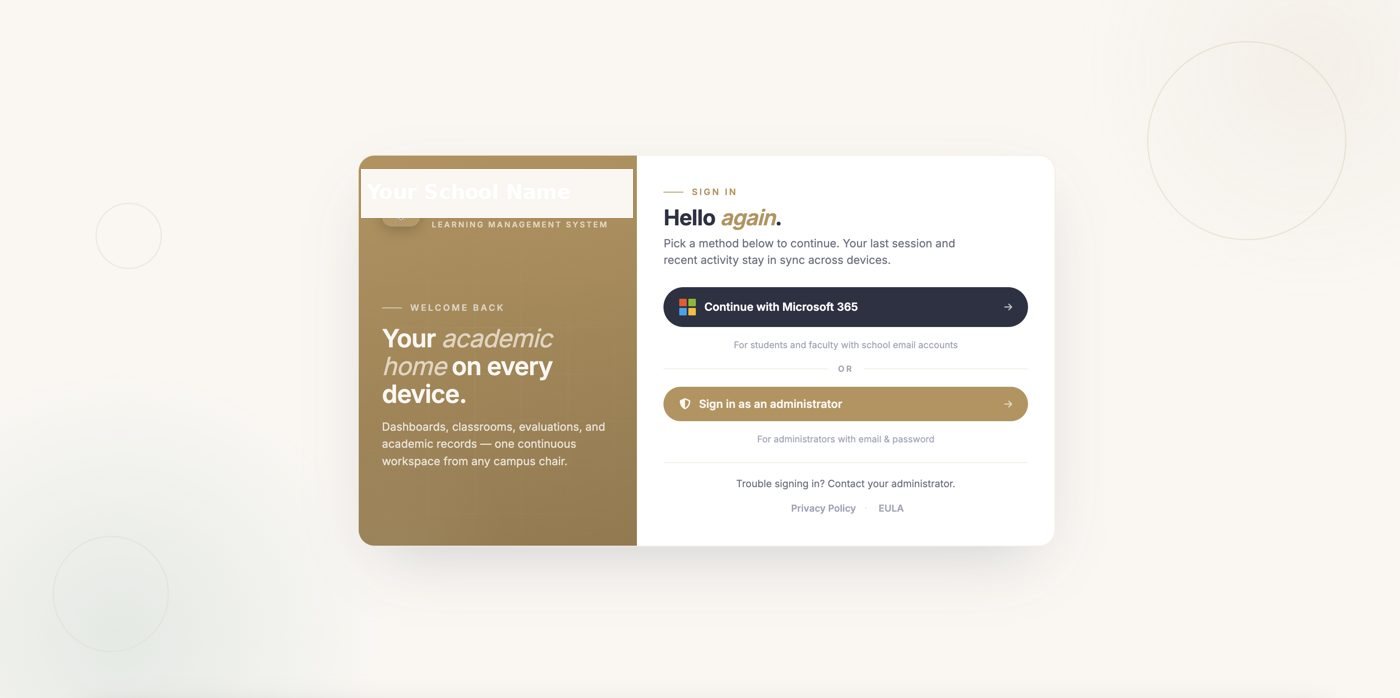
How do I sign in to ClassEdge?
- Open your school's ClassEdge web address (for example, classedge.yourschool.edu.ph).
- Click “Continue with Microsoft 365” — teachers always use this button.
- Enter your school email and password on Microsoft's own sign-in screen.
Do I need to install anything?
No. ClassEdge runs in any web browser — there is nothing to download or install.
How do I sign out?
Click the exit arrow at the bottom-left of the screen, next to your name.
Dashboard
Your home screen
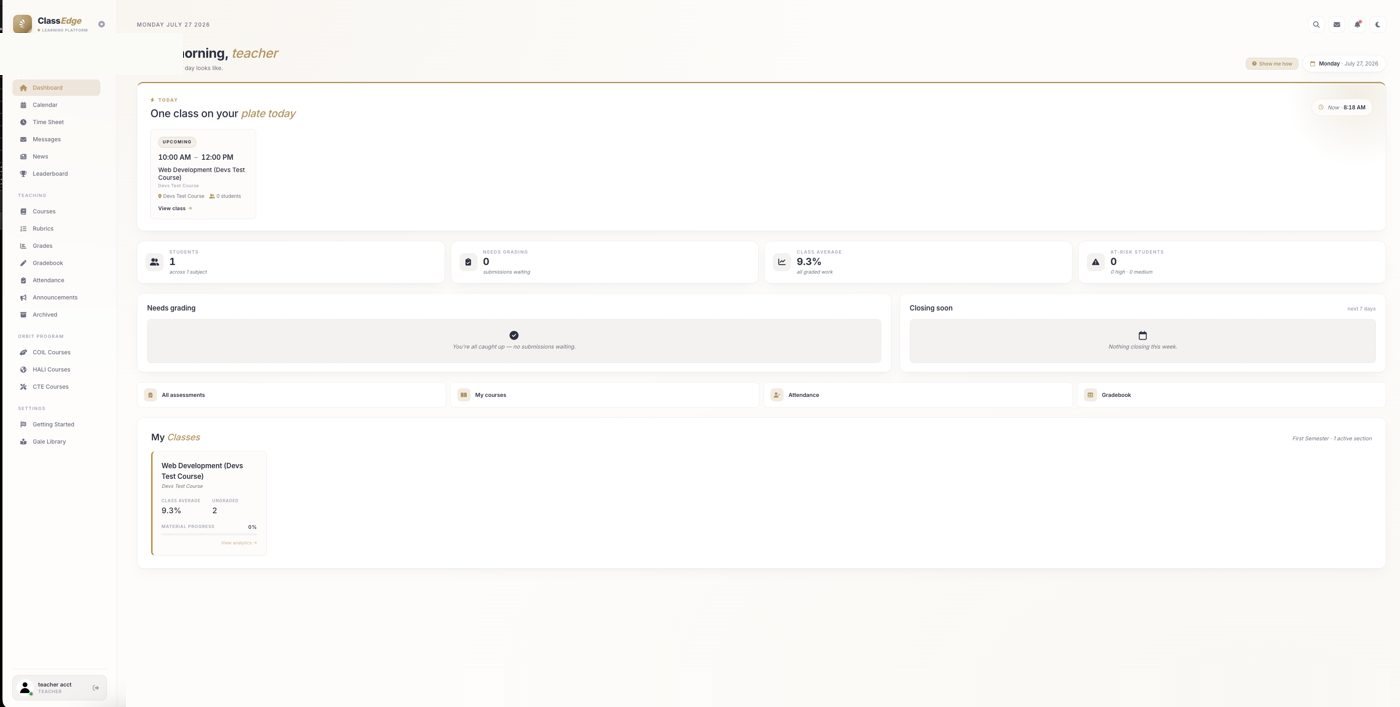
What do I see on my Dashboard?
The Dashboard is a summary of your teaching day:
- Greeting by name — shows whoever is signed in.
- Quick stats — students, needs grading, class average, and at-risk.
- Needs grading & closing soon — what needs you today.
- My Classes — a card for every class you teach.
Where are my notifications?
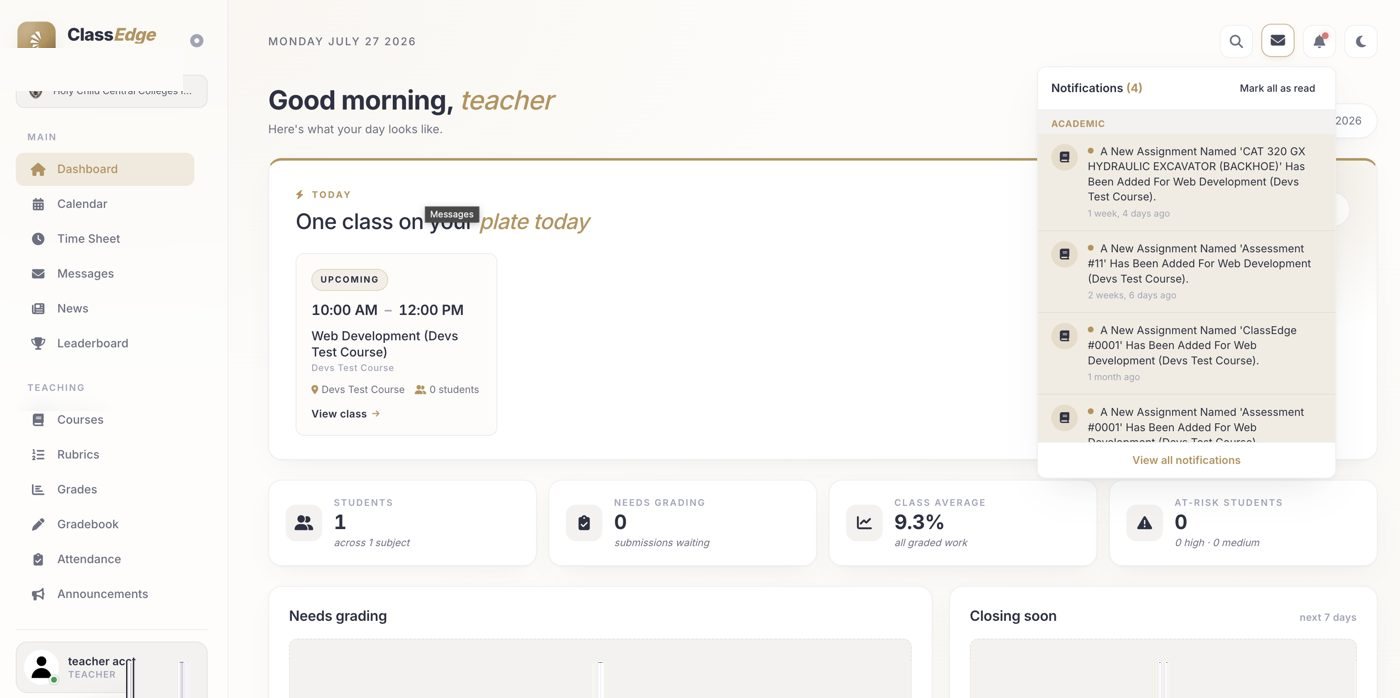
At the top-right of every screen you'll find Search, Messages, the notification bell, and the sun/moon theme switch. Click the bell to see new assignments, updates, and reminders. Mark all as read clears the red dot.
Can I switch to dark mode?
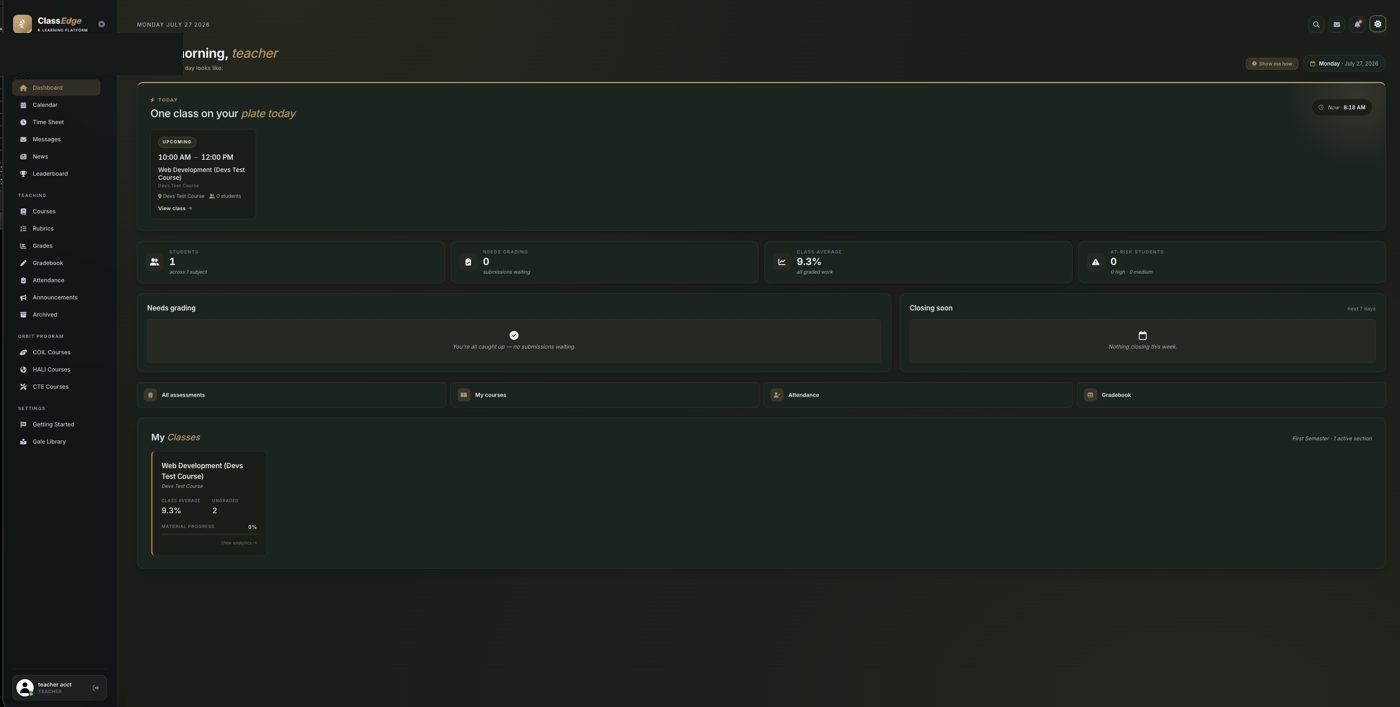
Yes — click the sun/moon icon at the top-right to switch between light and dark mode. Everything works the same in both.
Main Menu
Calendar, Time Sheet, Messages & more
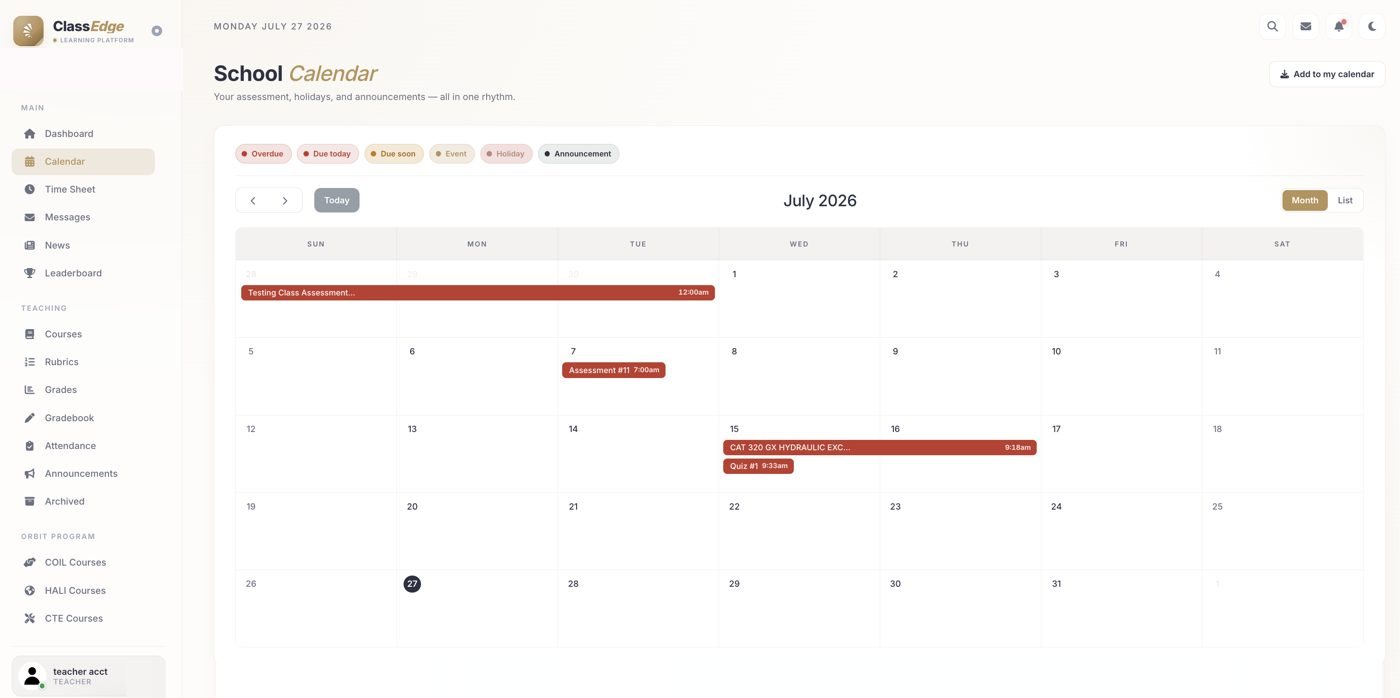
What does the Calendar show?
One view of everything — assessments, holidays, events, and announcements — with colour-coded labels for overdue, due today, due soon, event, and holiday. Switch between Month and List views, and use “Add to my calendar” to export it to your personal calendar.
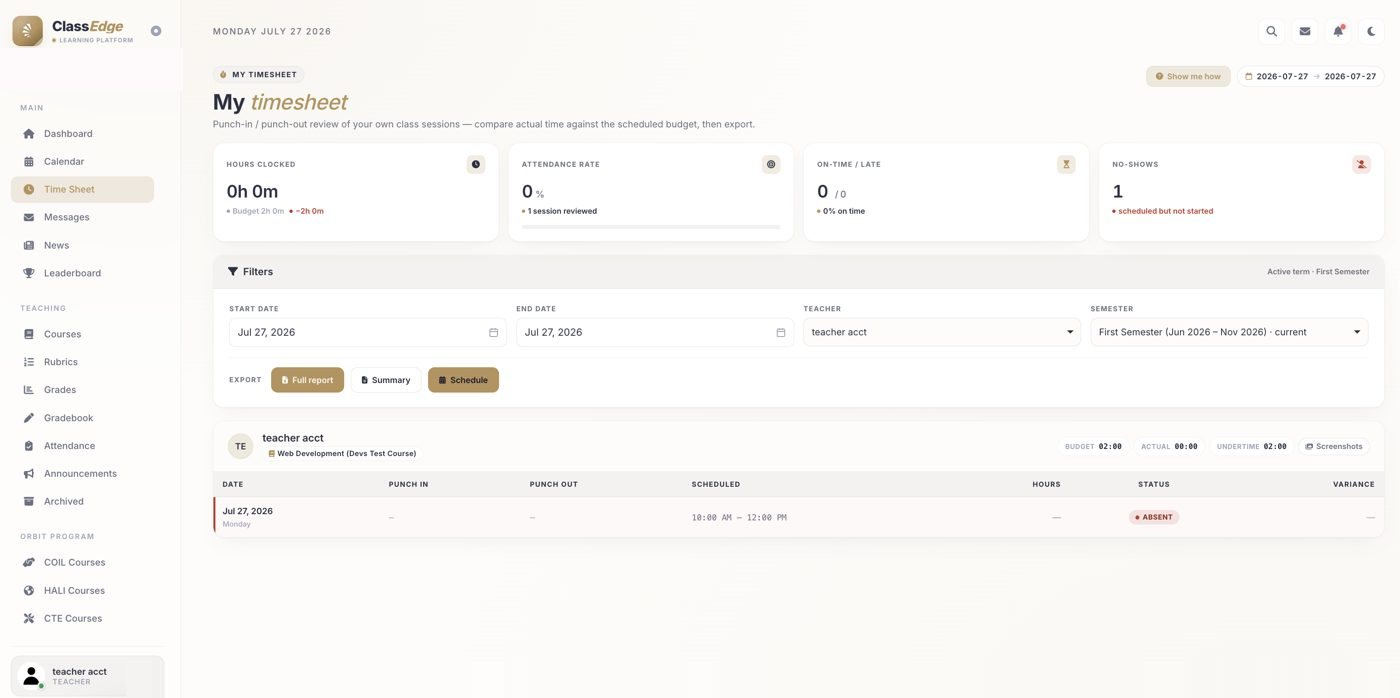
What is the Time Sheet for?
It lets you review your class sessions — punch-in / punch-out against your scheduled times, plus hours, attendance rate, and lates at a glance. You can filter the data and export a full report, a summary, or your schedule.
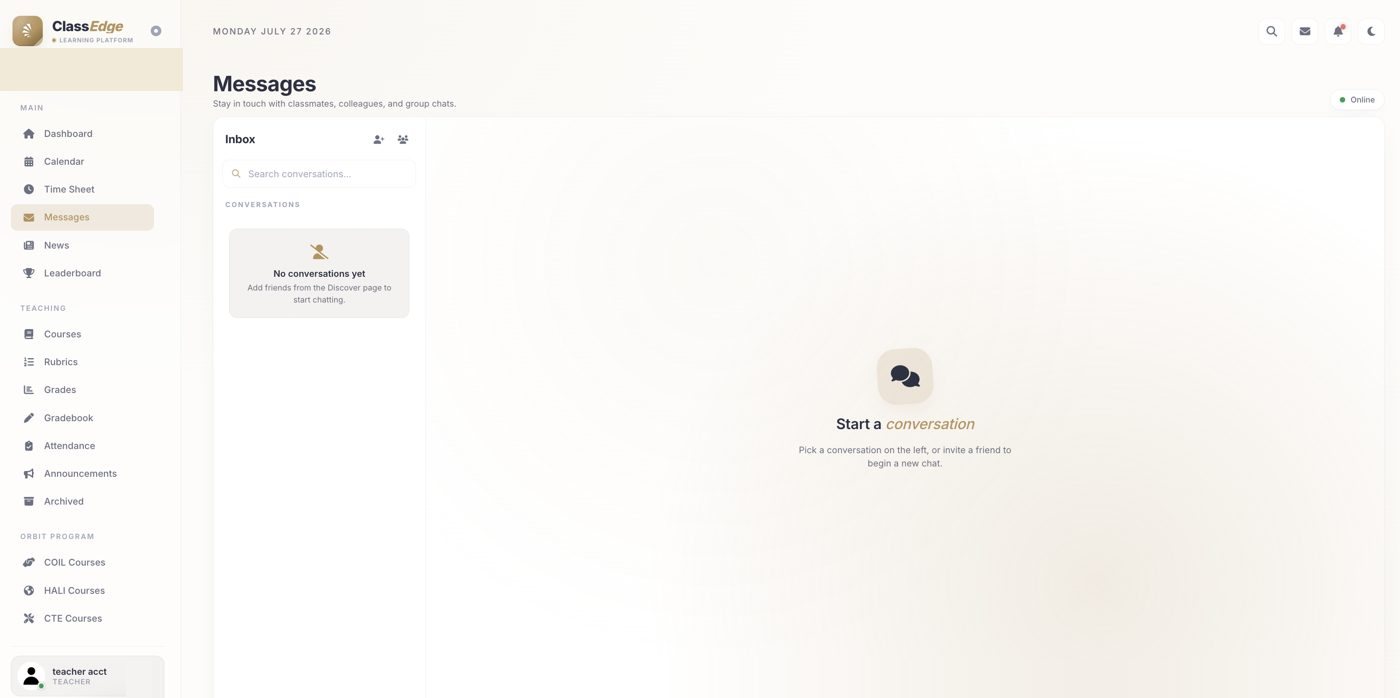
How do I message a colleague or student?
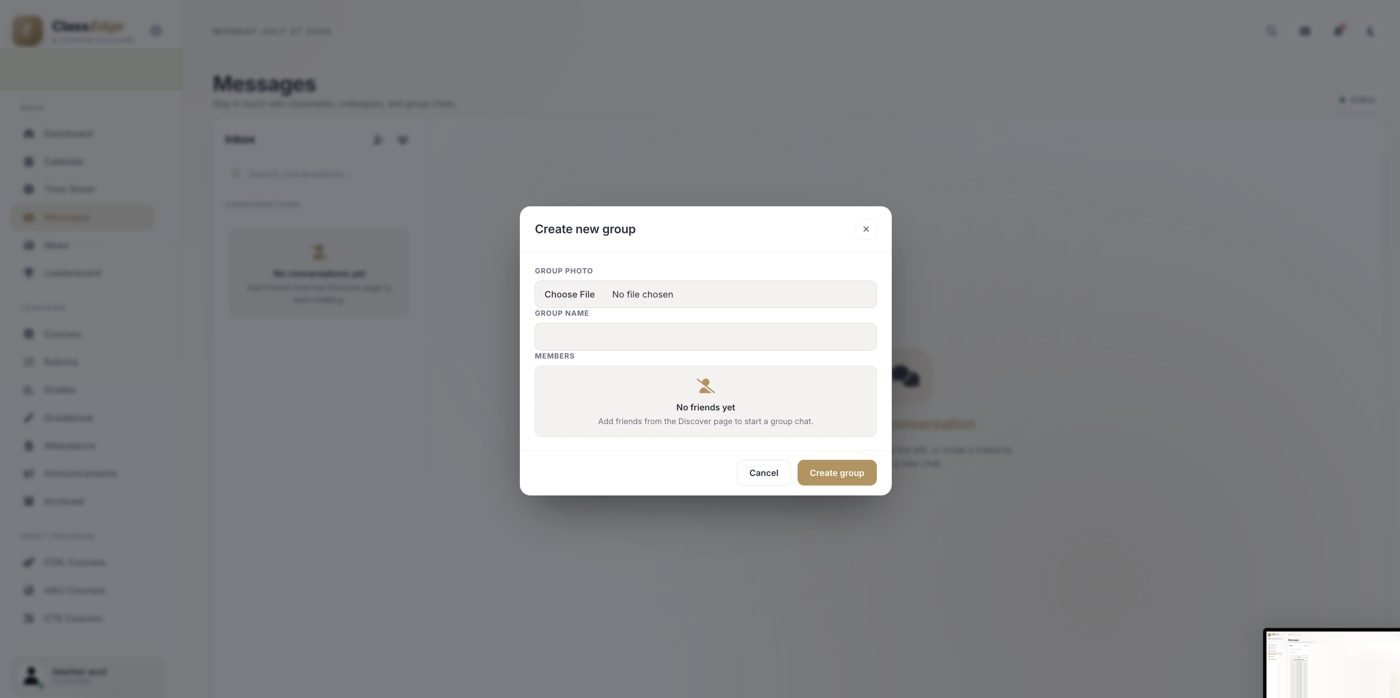
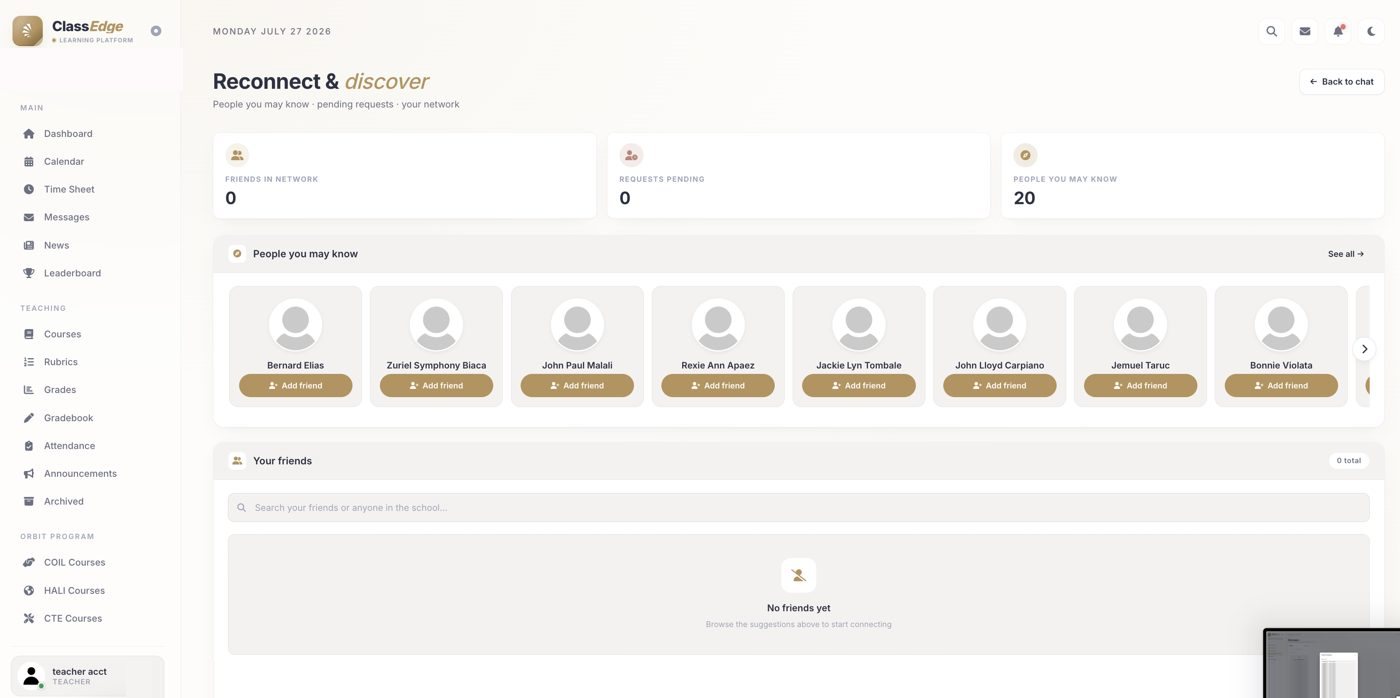
Open Messages — a simple inbox for chatting with colleagues and students. If you have no chats yet, start a conversation and add people from “Reconnect & discover.” You can also create group chats.
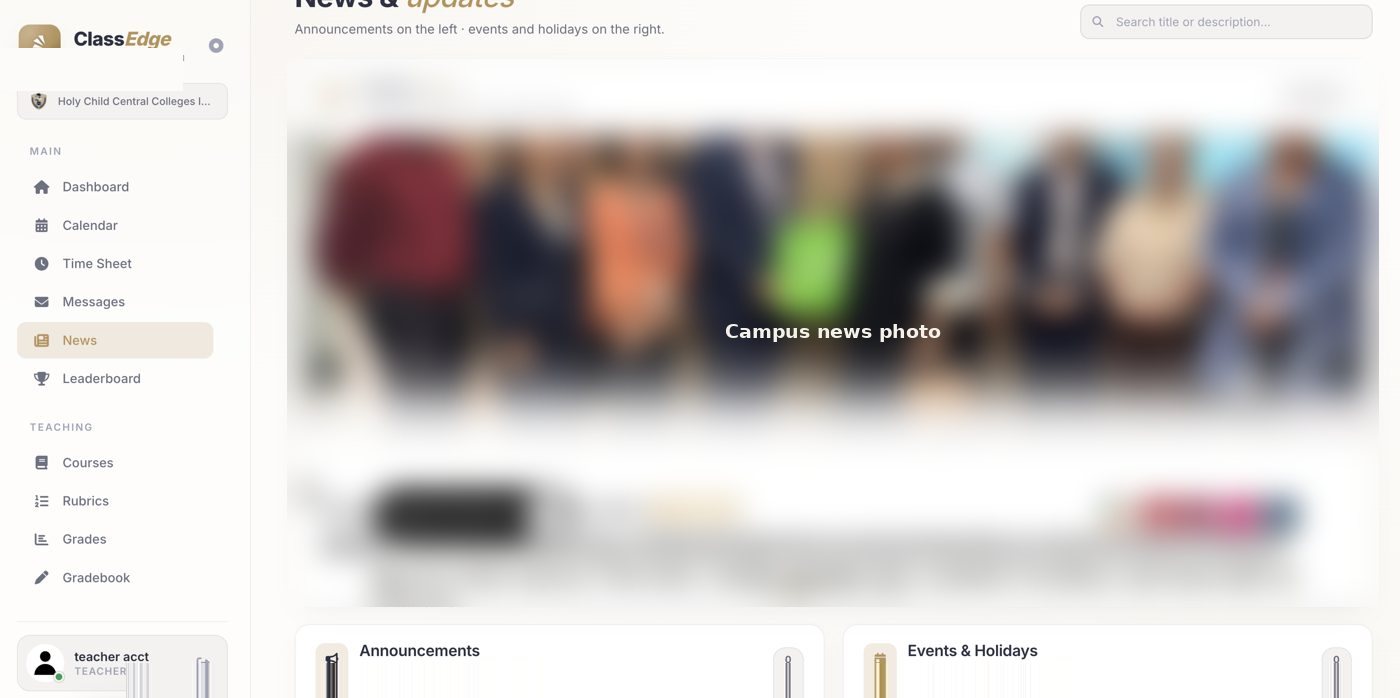
Where do I see campus news?
On the News page: campus news appears on the left, with announcements and events on the right.
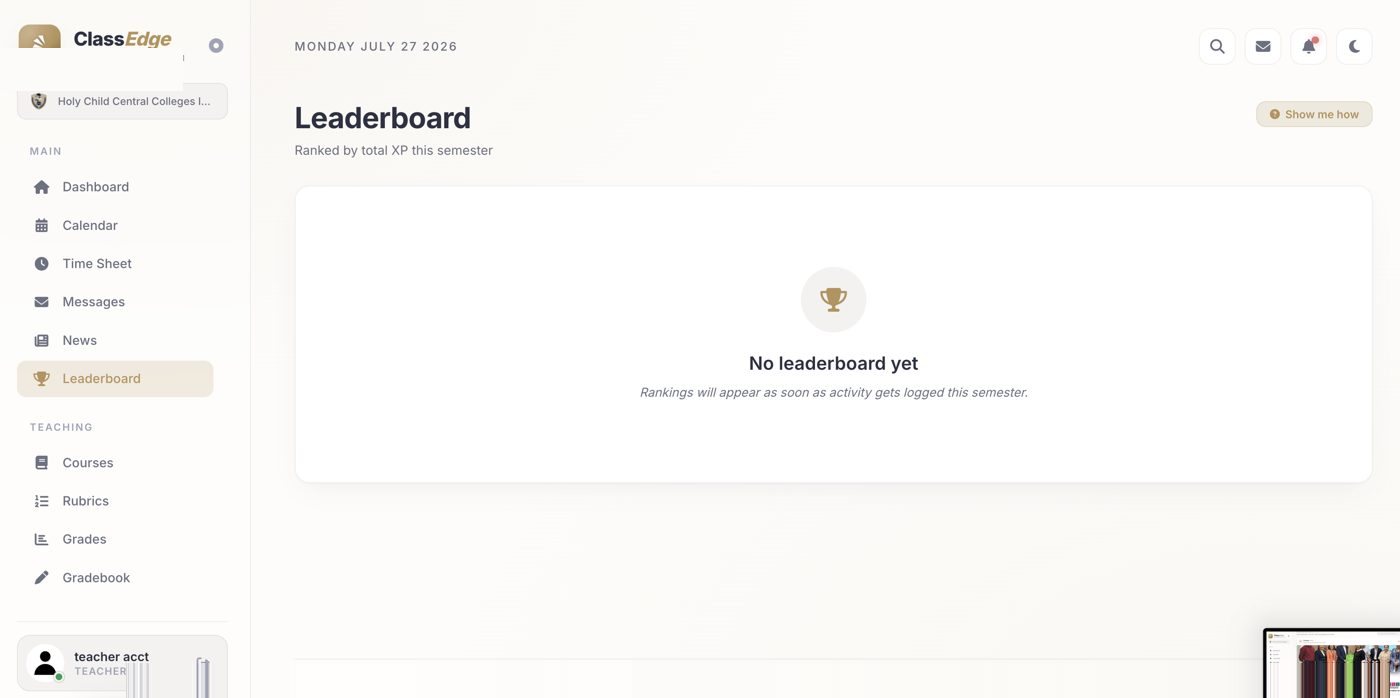
What is the Leaderboard, and why is mine empty?
The Leaderboard ranks activity by total XP for the semester. Early in the term it shows “No leaderboard yet” until activity is logged — that's normal.
Courses & Classrooms
Where your classes live
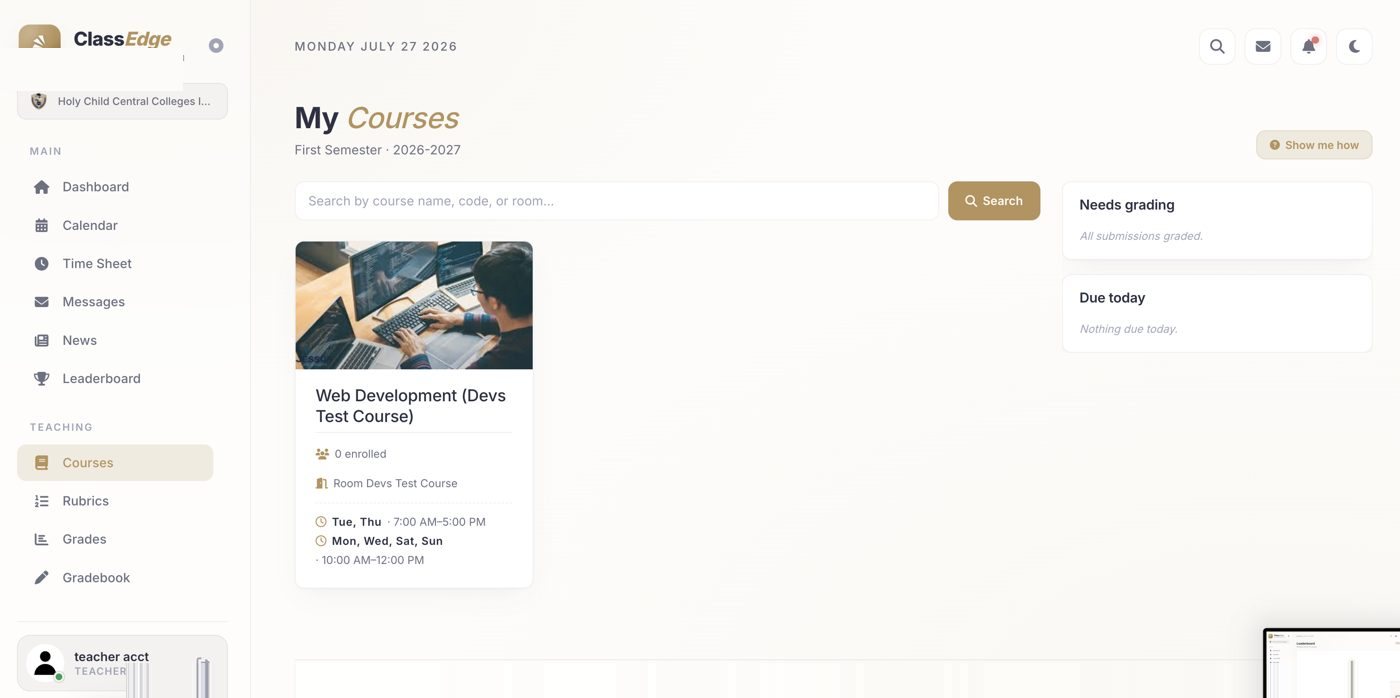
Where do I find my classes?
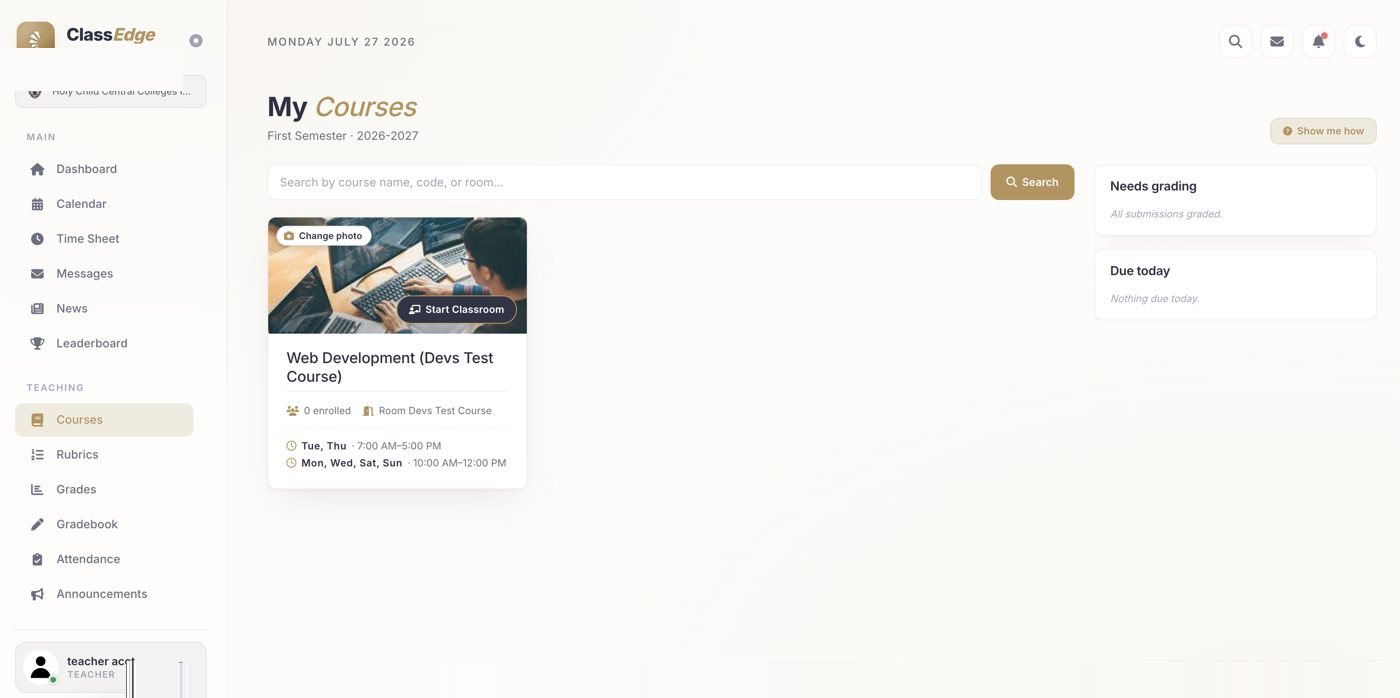
On the Courses page. Every class you teach has a card showing its name, students, room, and schedule, with Needs grading and Due today shown on the right.
How do I open a class or start a live session?
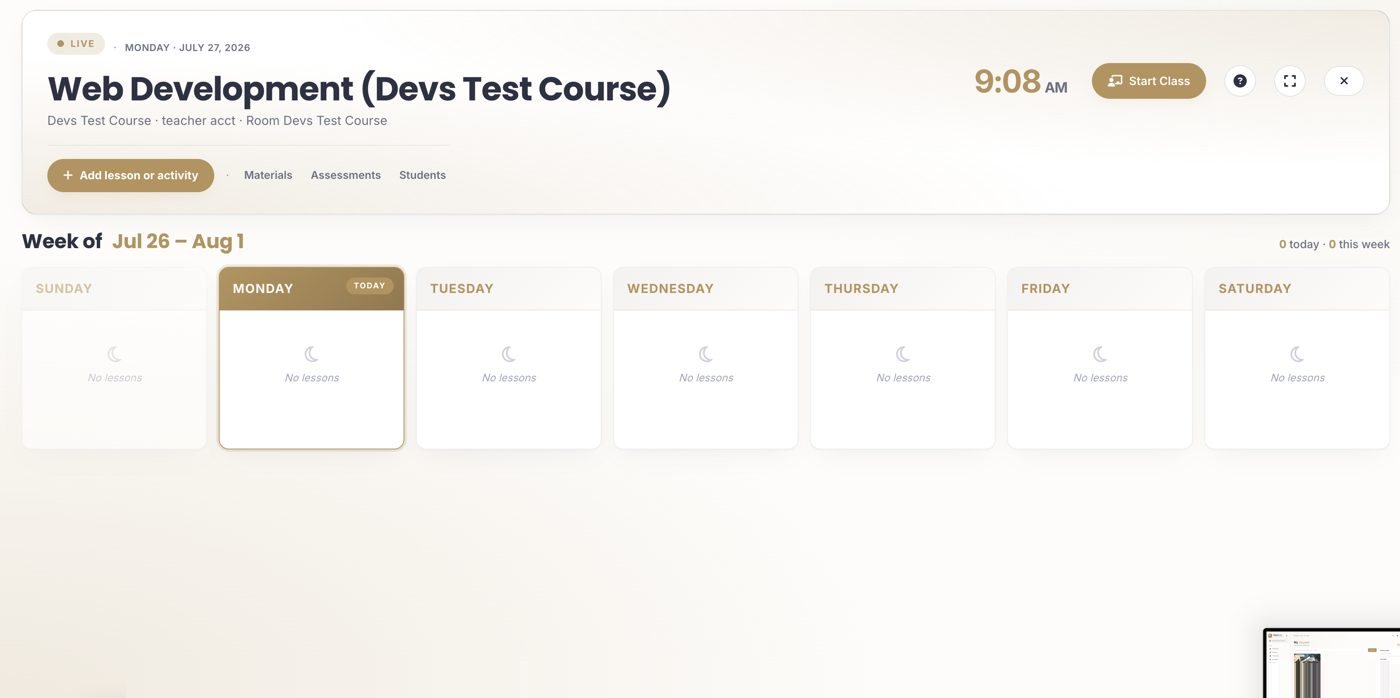
Click a course card to go inside. Hovering a card also reveals “Change photo” and “Start Classroom.” Inside the class, the Start Class button begins a live session.
What's inside a class page?
- The week laid out by day — plan lessons and activities.
- Materials · Assessments · Students — tabs that switch between the parts of the class.
- “Add lesson or activity” — the gold button for adding new items.
- Start Class — begins a live session.
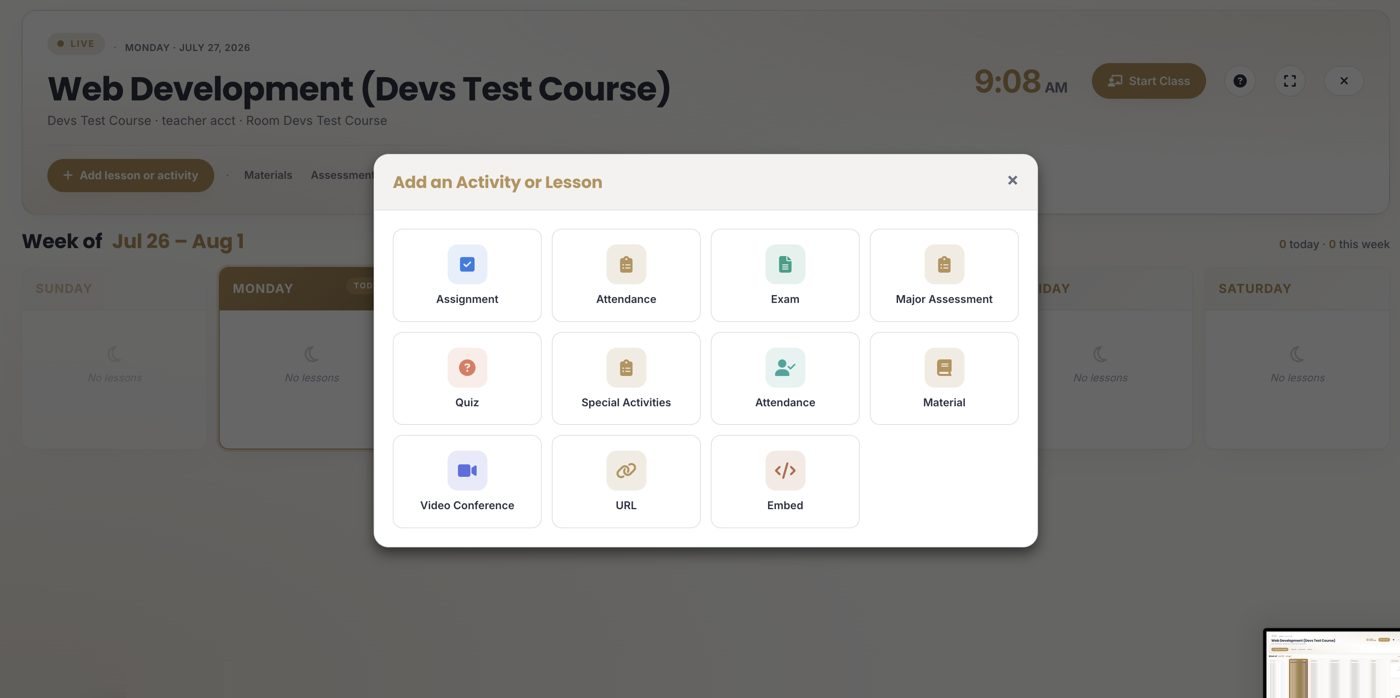
How do I add a lesson or activity?
Click the gold “Add lesson or activity” button inside the class, then pick the kind of item — graded work, a material, attendance, or a live link.
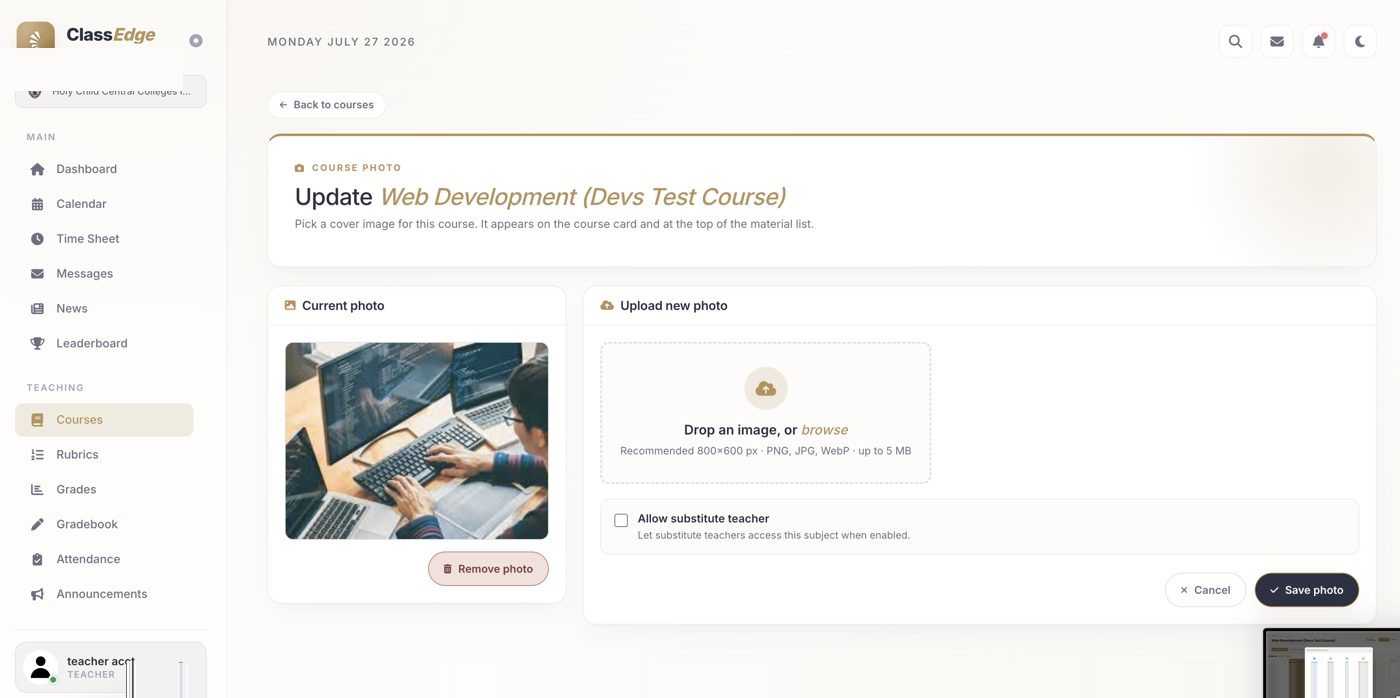
How do I change the course photo or see my class roster?
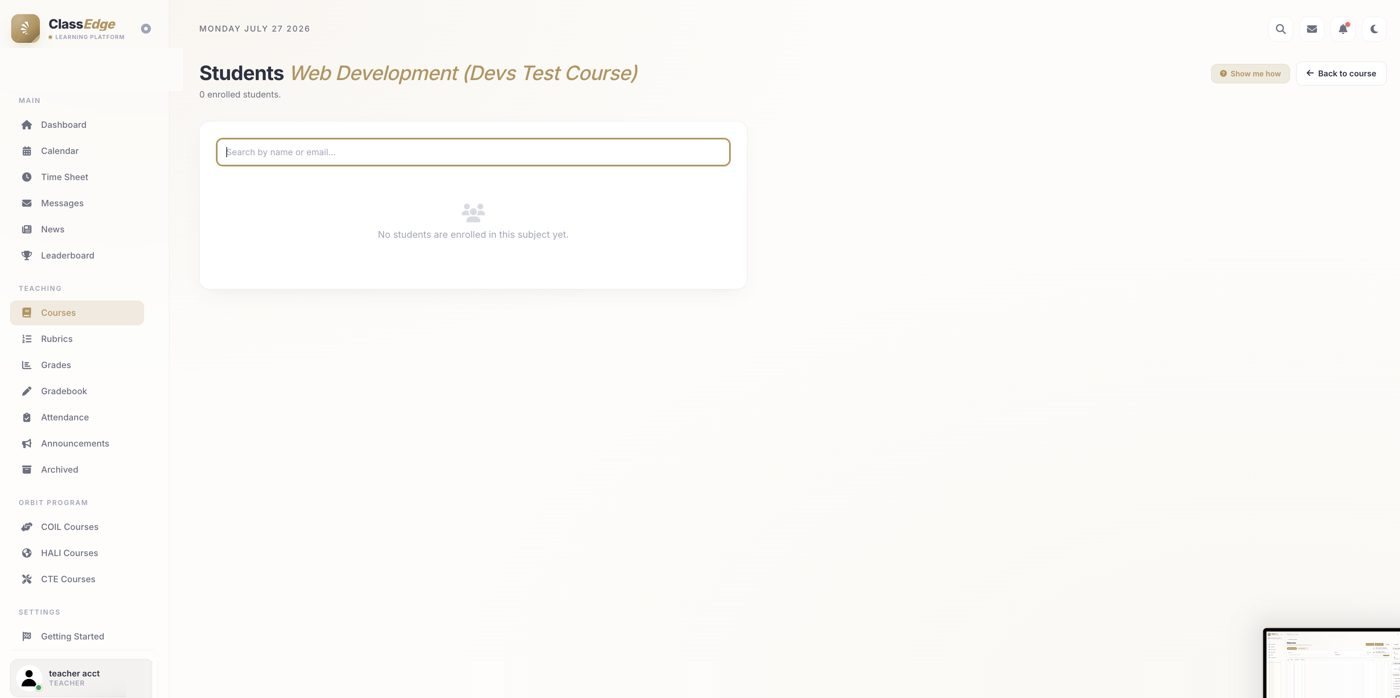
Hover the course card and click “Change photo” to update the picture. The class roster is under the Students tab inside the class.
Materials
Files, lessons and resources
How do I add a material?
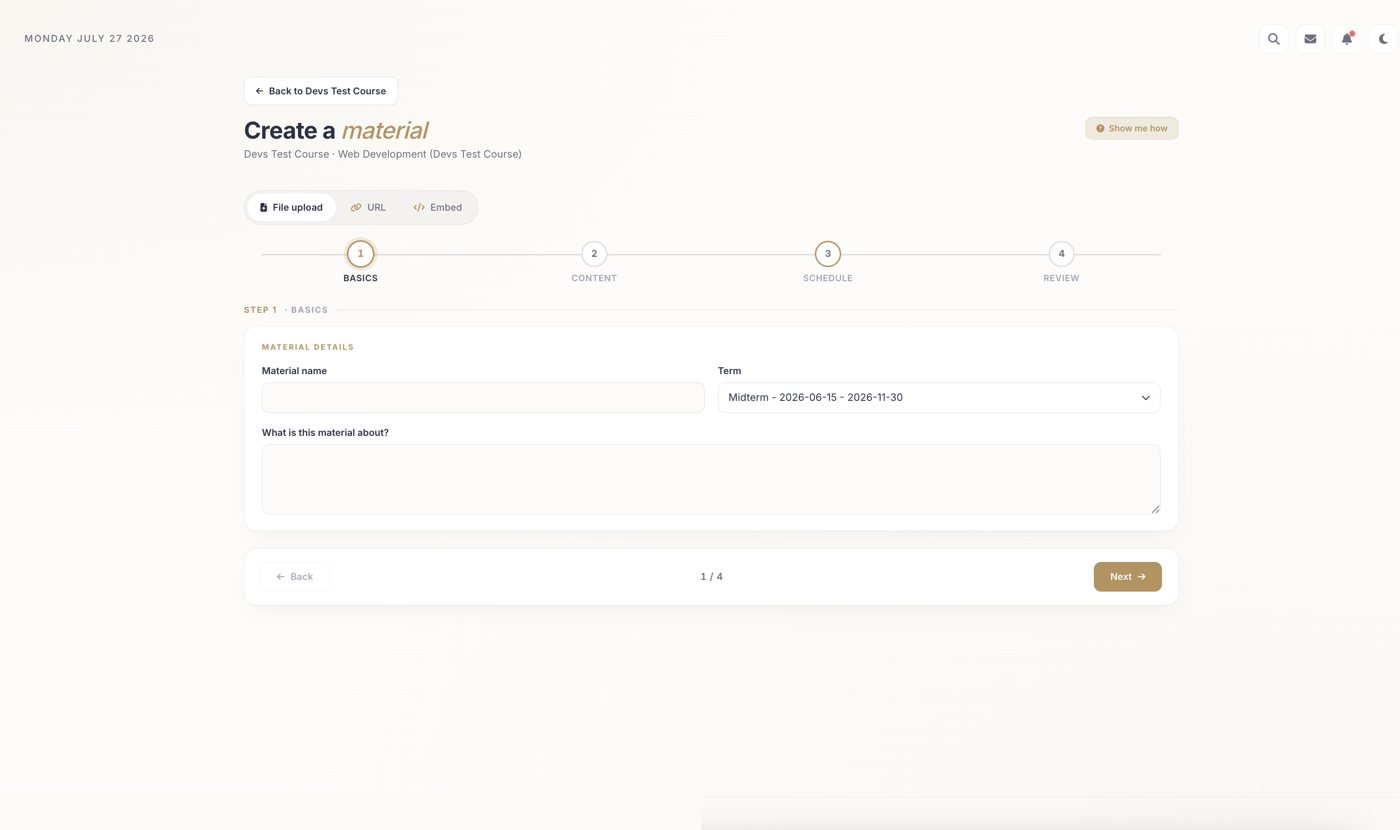
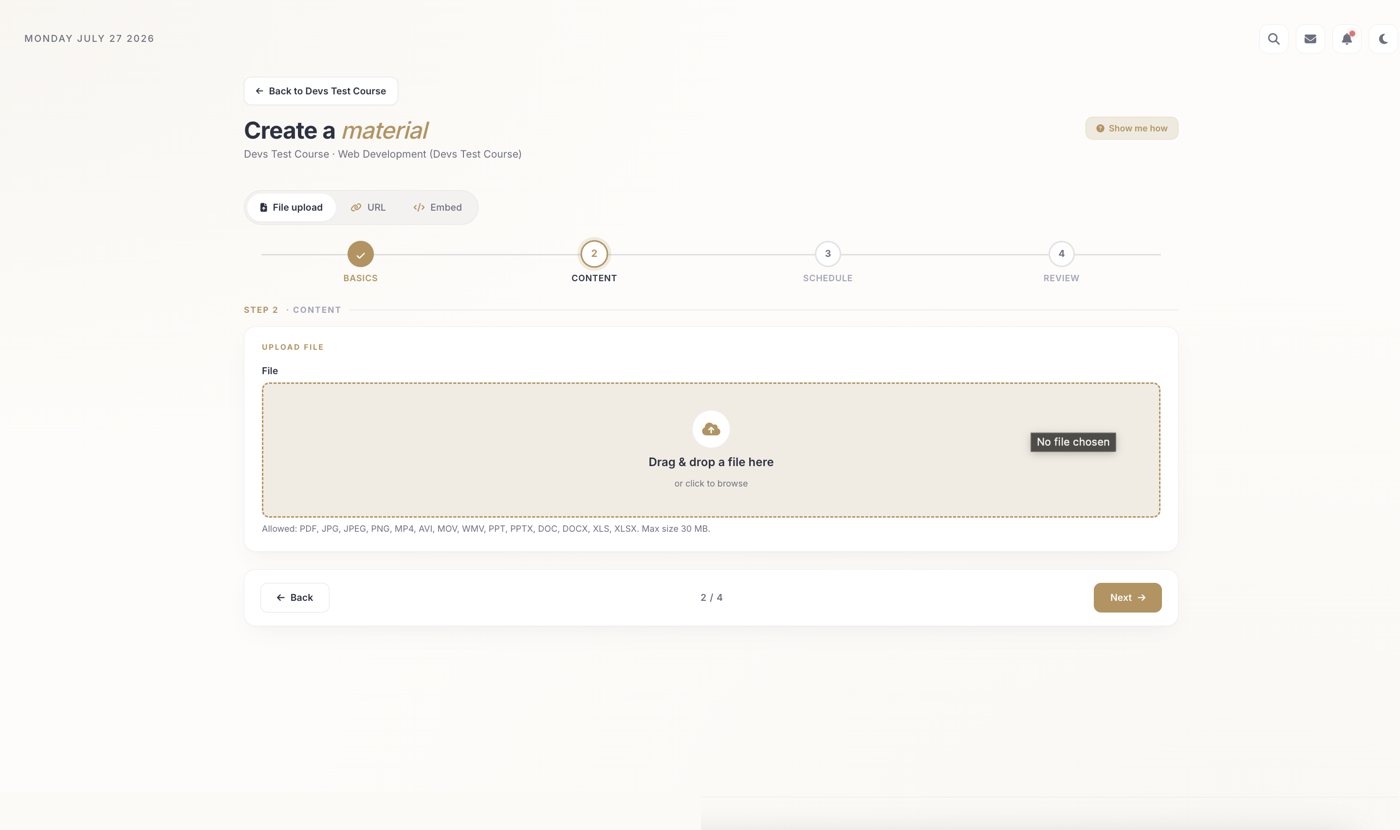
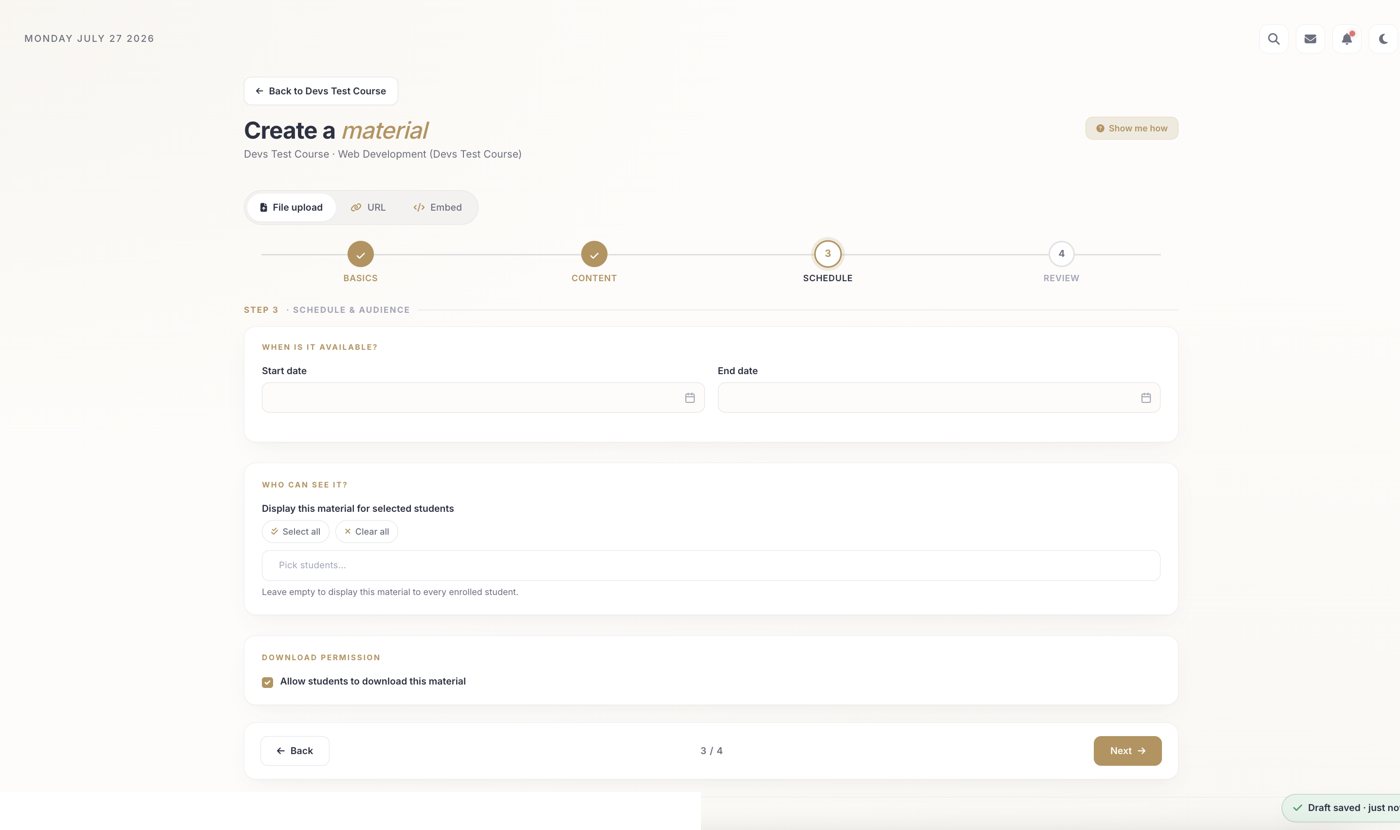
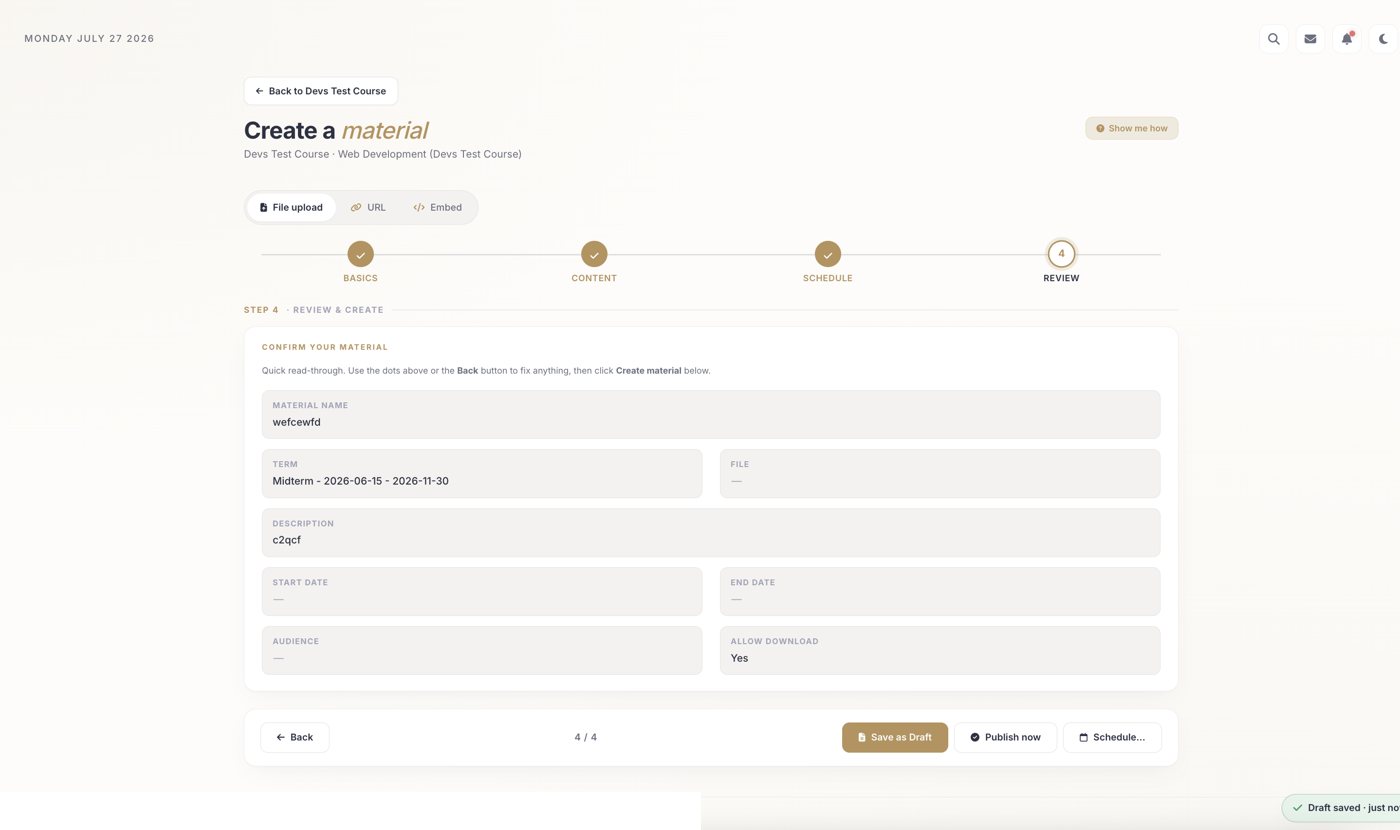
Click Add material to open the four-step wizard:
- Basics — name, term, description.
- Content — drag & drop a file (up to 30 MB).
- Schedule & audience — when and who.
- Review — then Publish, Schedule, or Save as draft.
What do the statuses on the Materials list mean?
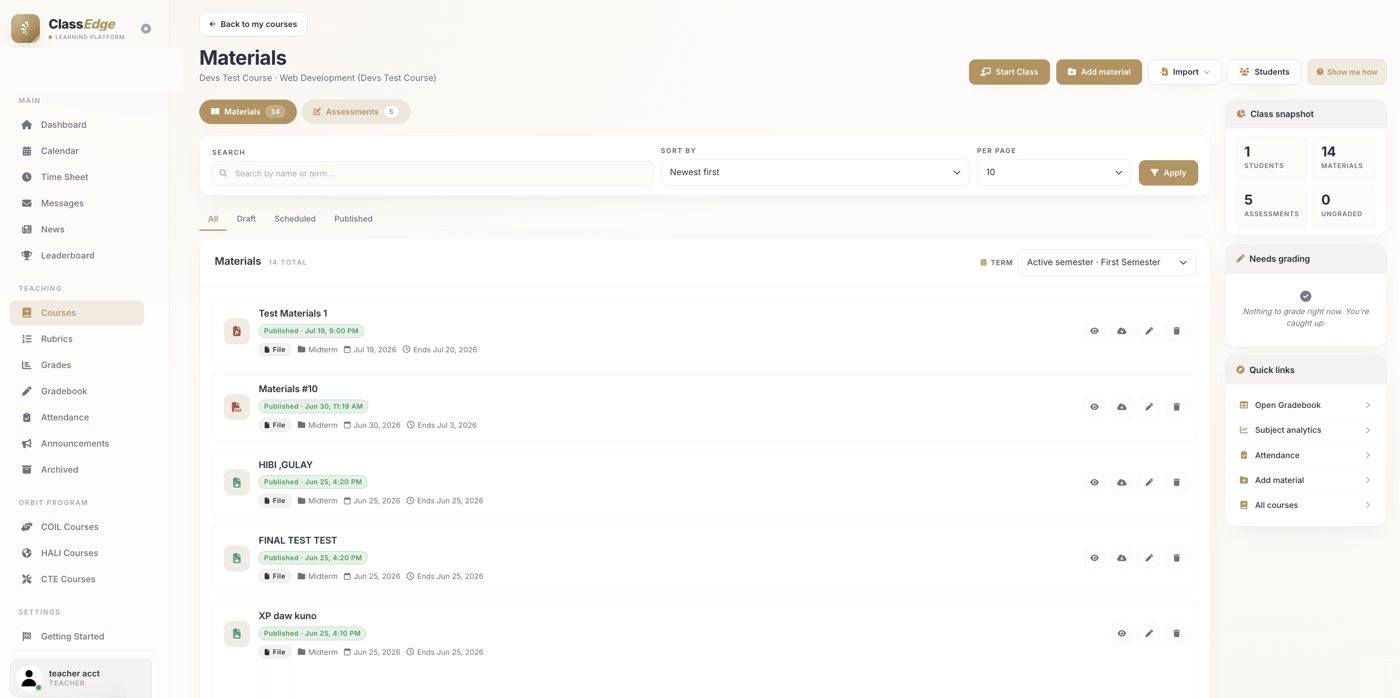
Each row shows its status and term — Published, Draft, or Scheduled. Use the filter tabs (All / Draft / Scheduled / Published) to narrow the list, and the row icons to preview, download, edit, or delete.
Can I reuse materials from a previous semester or another course?
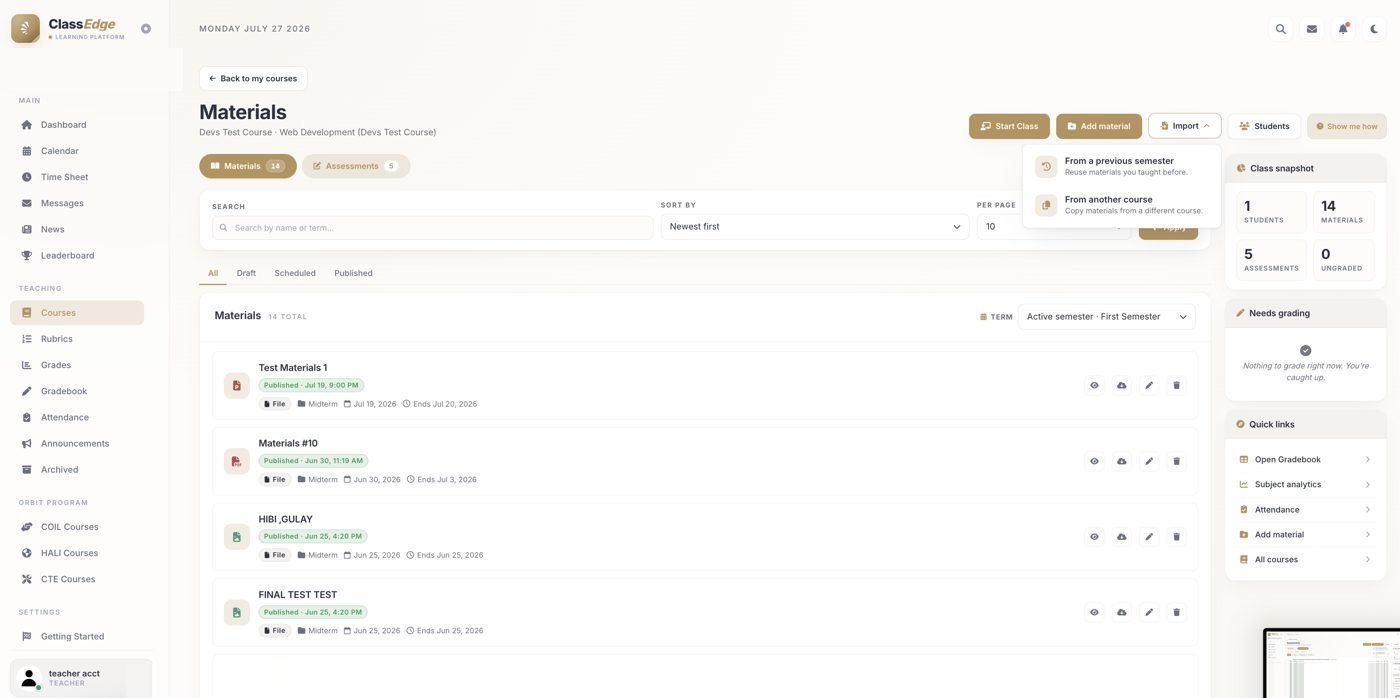
Yes — don't start from scratch. Use the Import button to reuse what you taught in a previous semester or copy materials from a different class.
Assessments
Every graded item
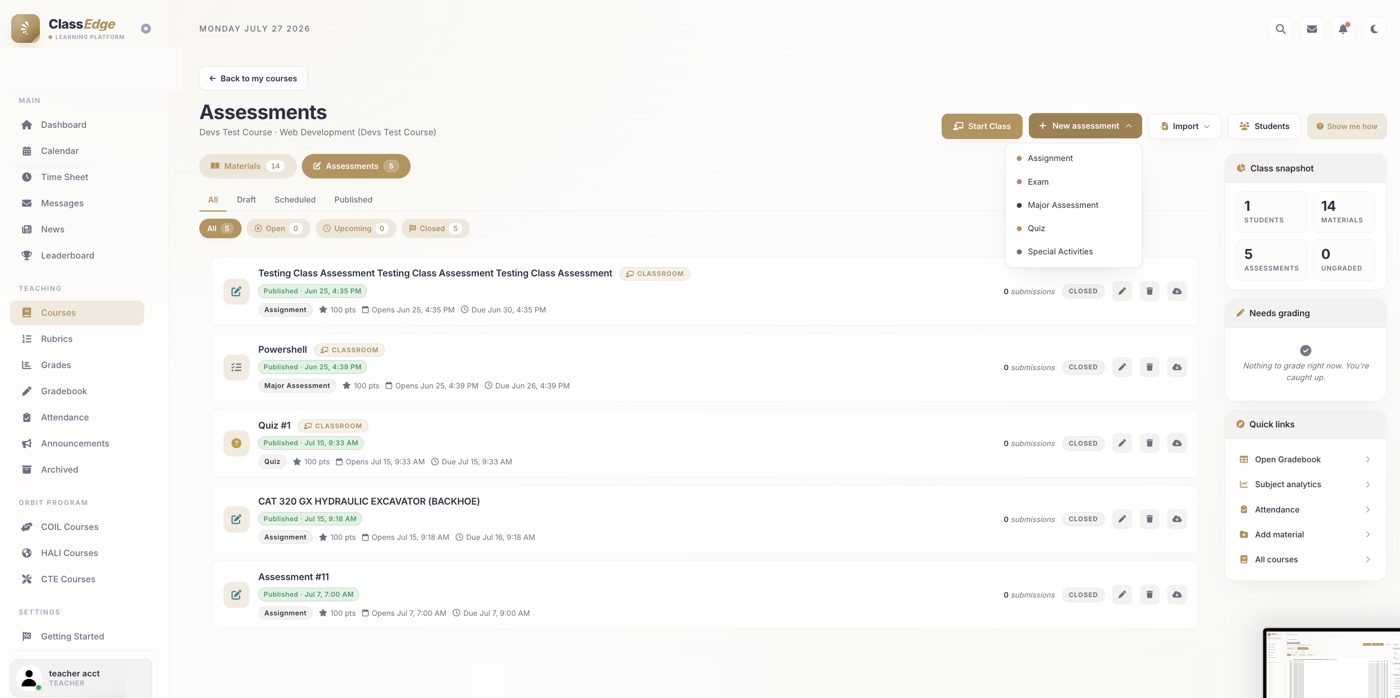
What types of assessment can I create?
- Assignment — everyday work students submit: homework, seatwork, outputs.
- Quiz — a set of questions, often timed; short knowledge checks.
- Exam — a longer, higher-stakes test.
- Major Assessment — a large, heavily-weighted project or output.
- Special Activities — anything graded that doesn't fit above.
Every assessment's score flows into the Gradebook.
How do I create an assessment?
Two ways, and both open the same four-step builder:
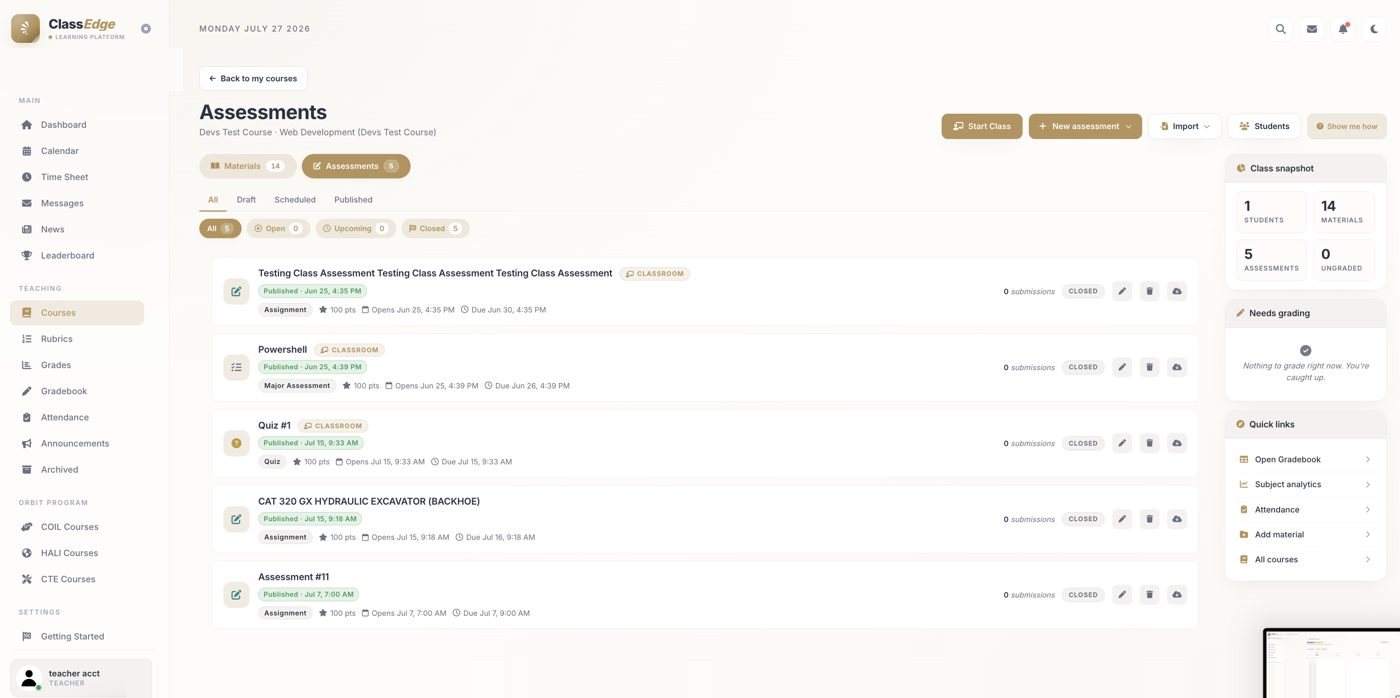
- From the Assessments tab — click “New assessment” and choose the type.
- From inside the class — “Add lesson or activity”, then pick a type.
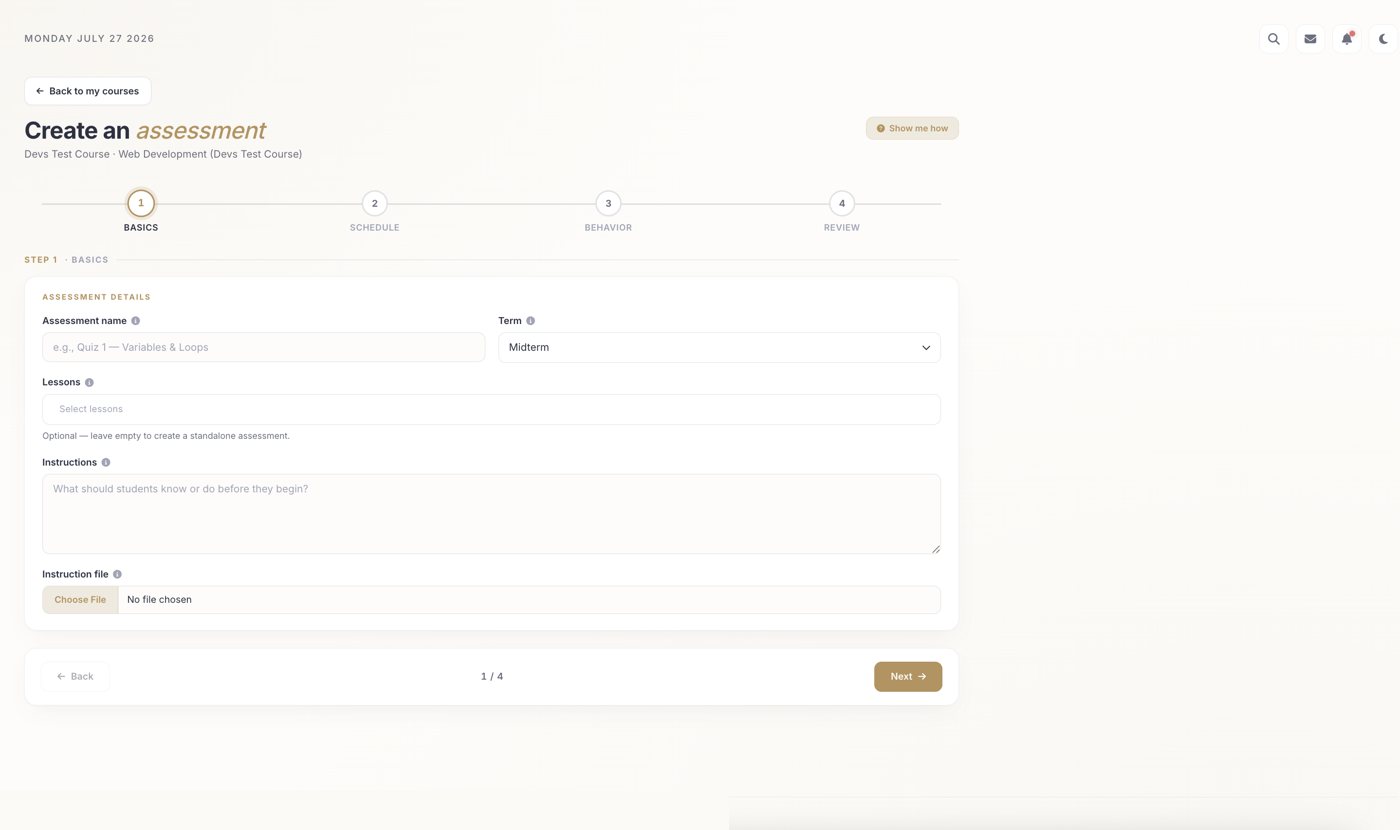
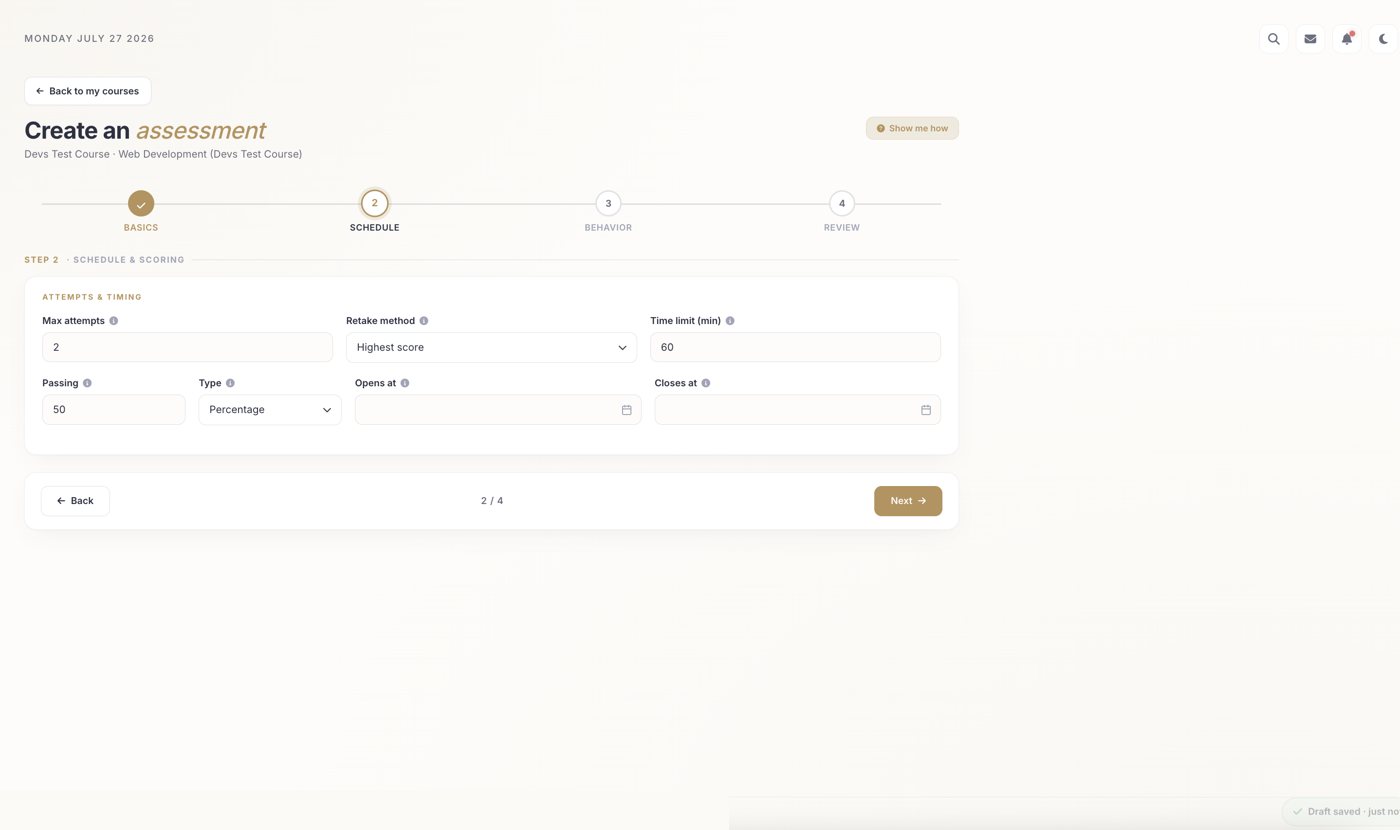
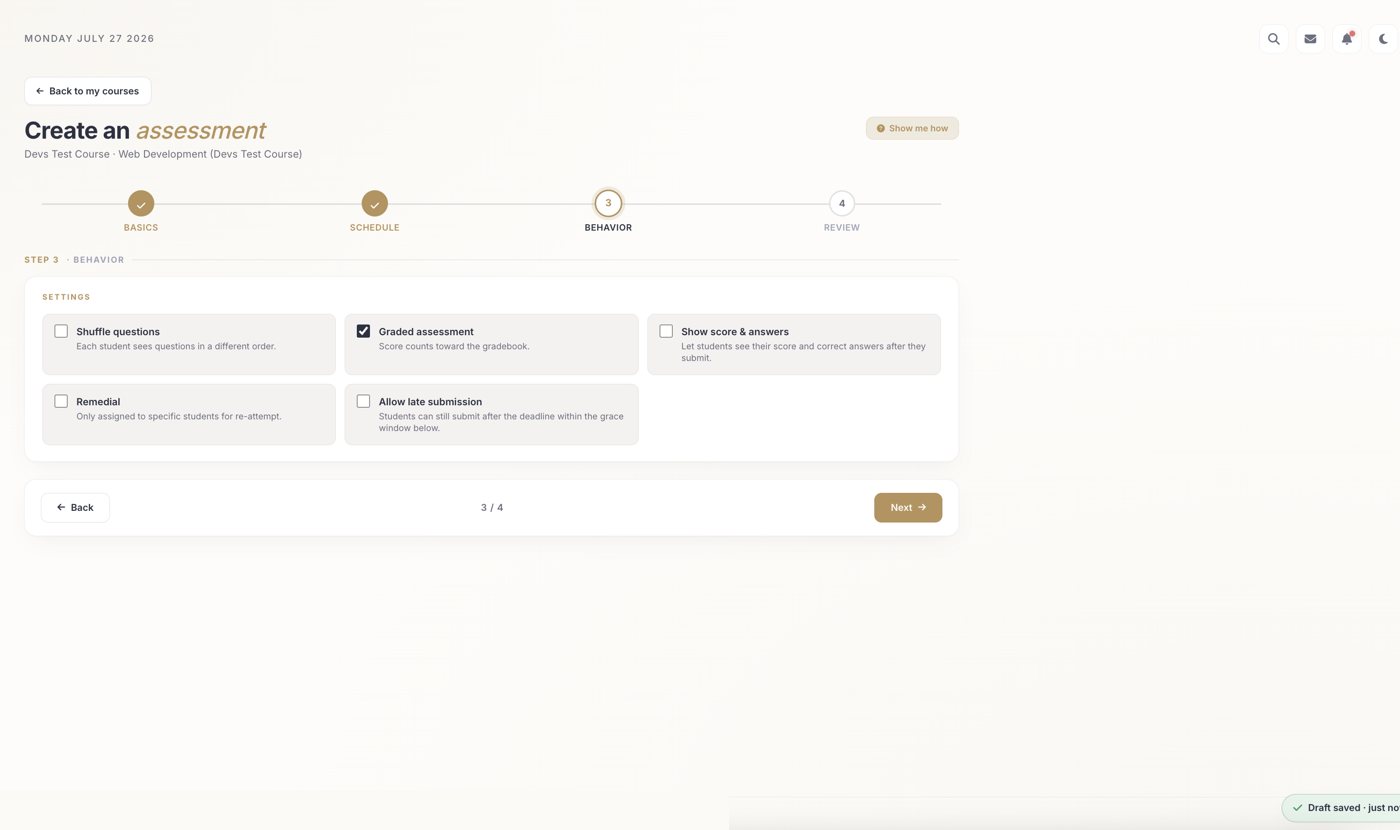
The wizard walks you through: 1 · Basics (name, term, instructions), 2 · Schedule & scoring, 3 · Behavior (shuffle, grading, late policy), and 4 · Review & create.
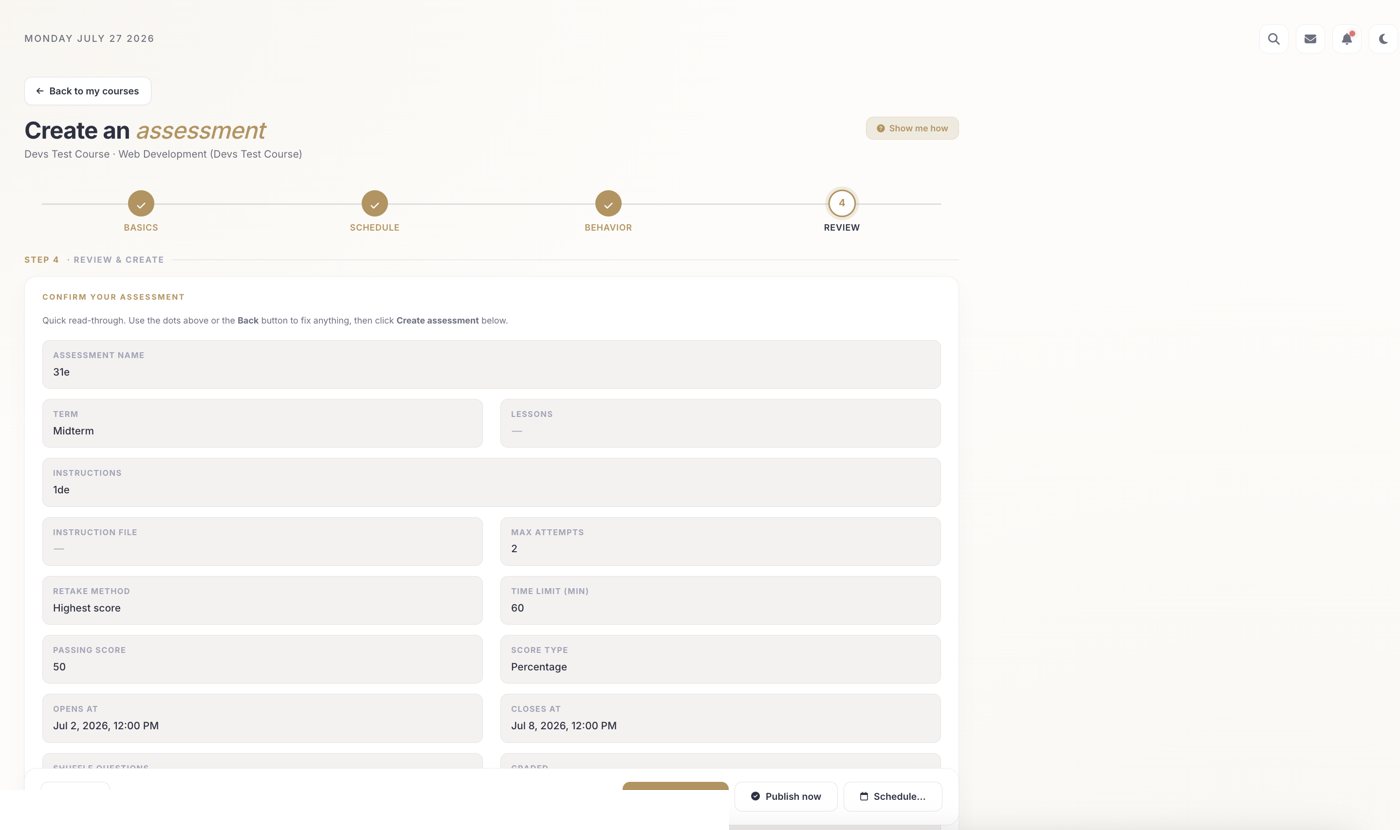
How do I add questions?
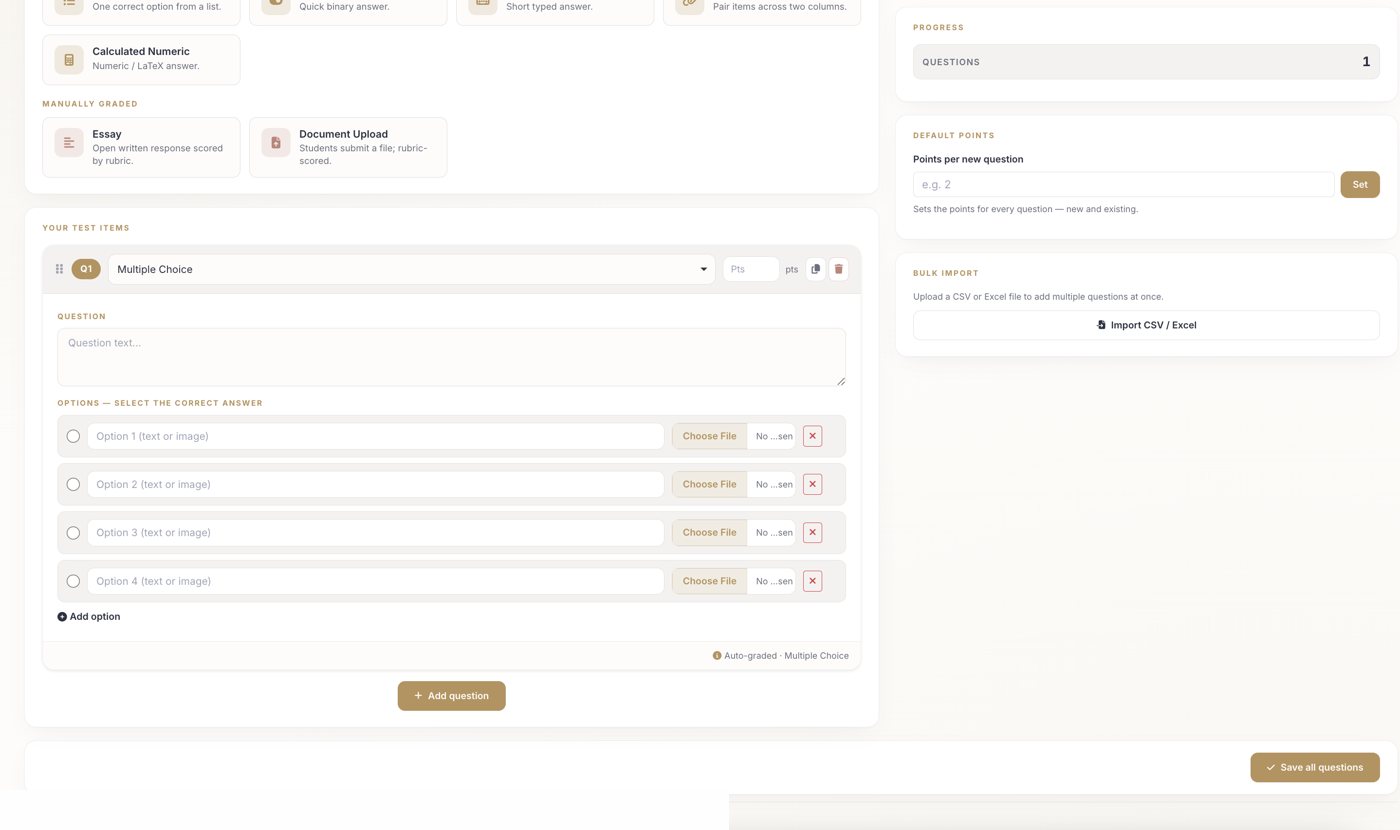
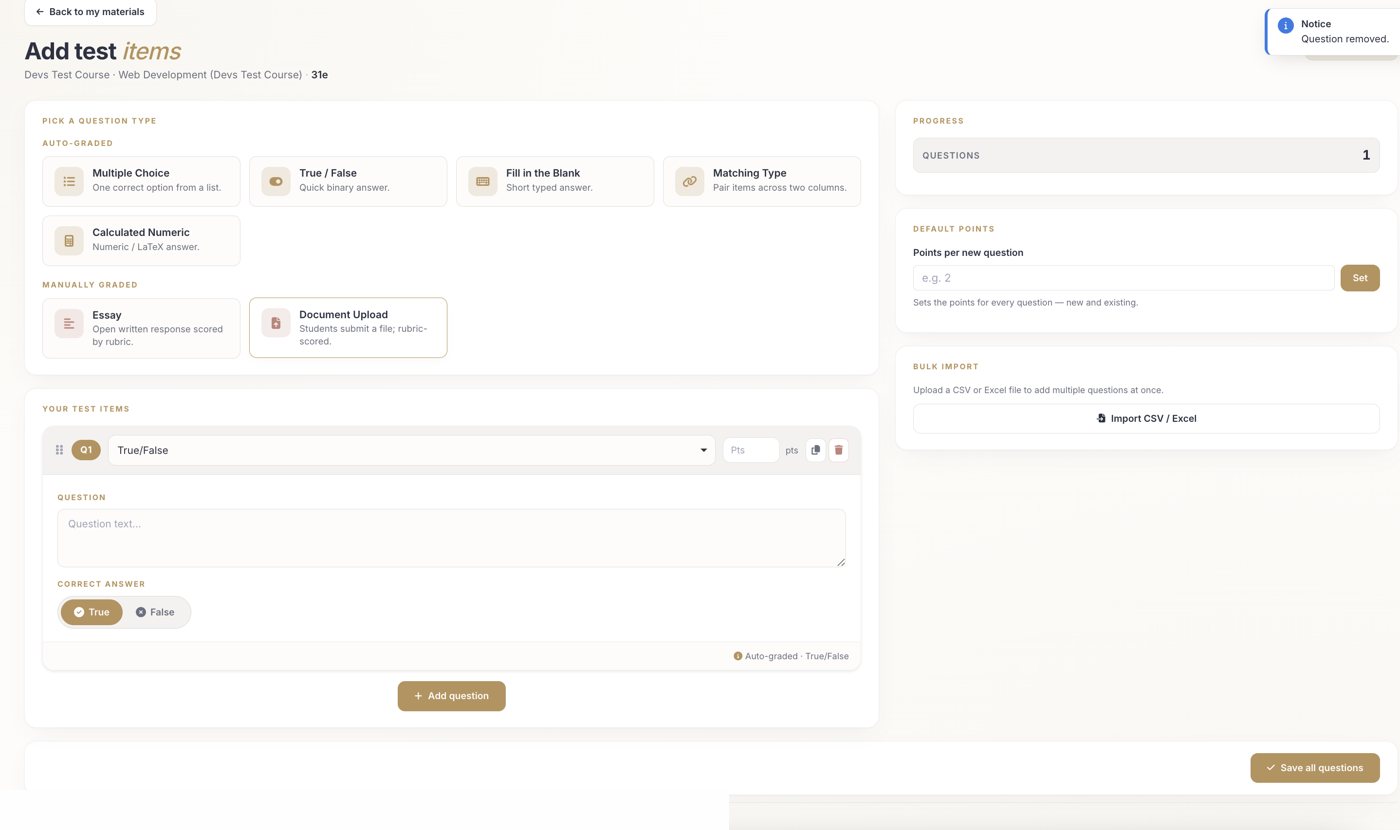
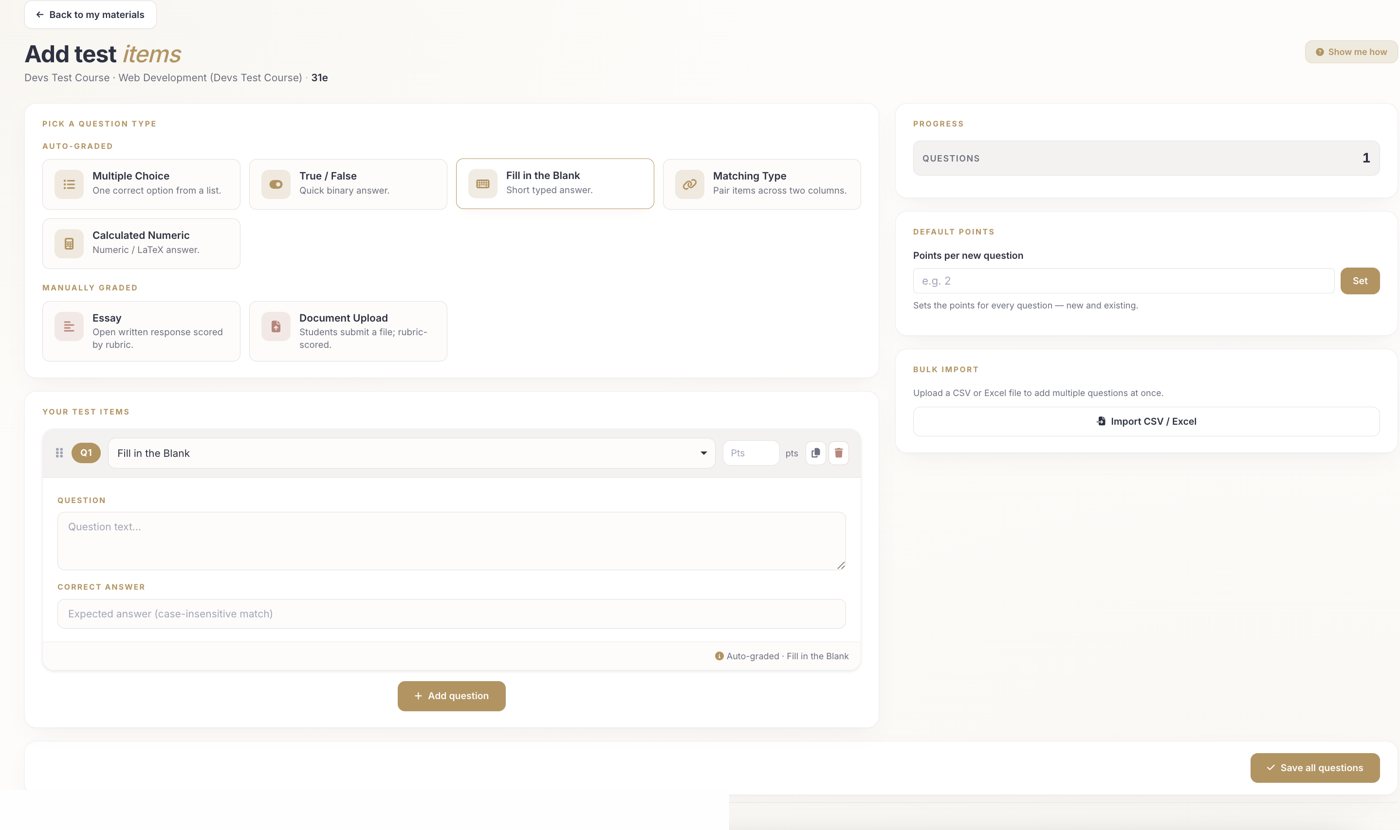
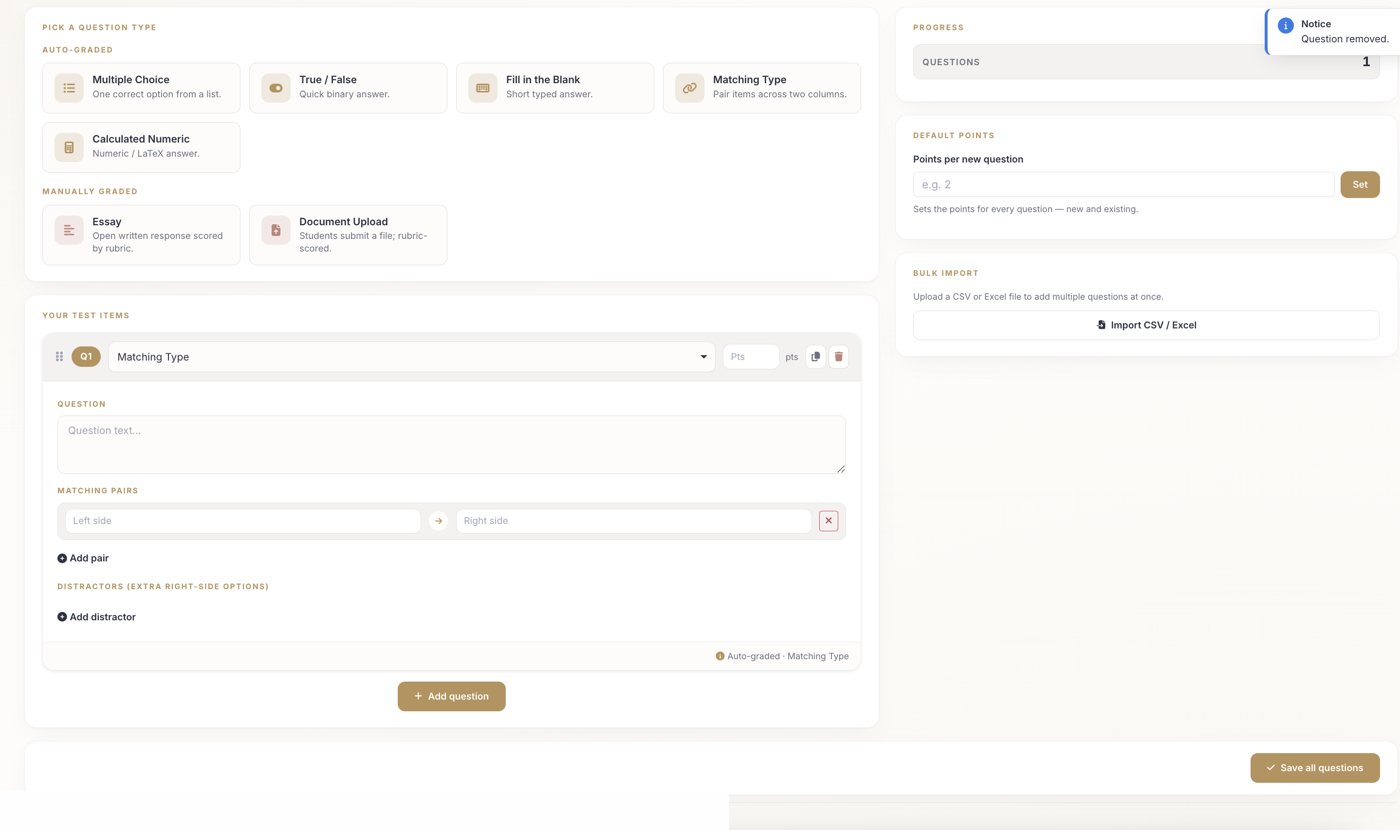
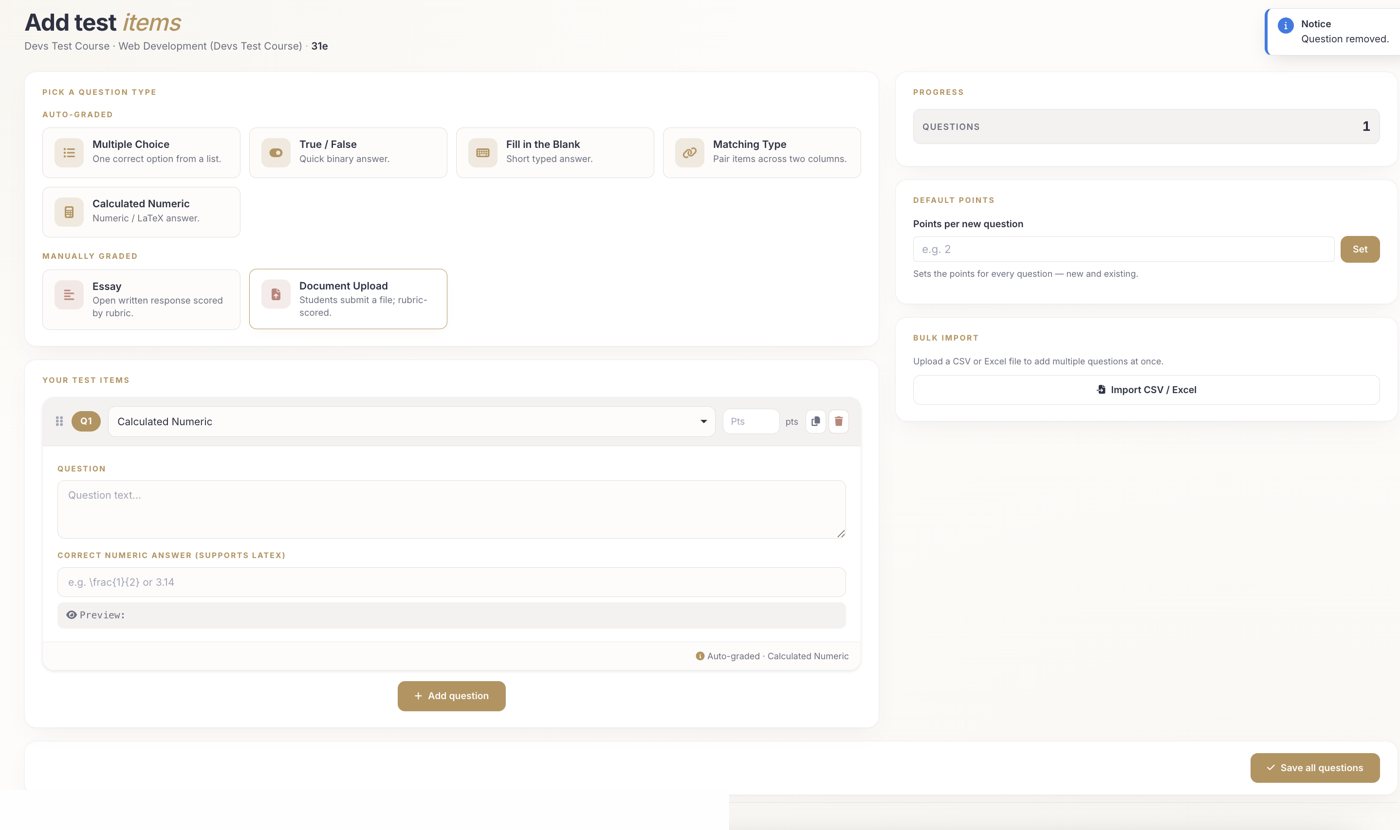
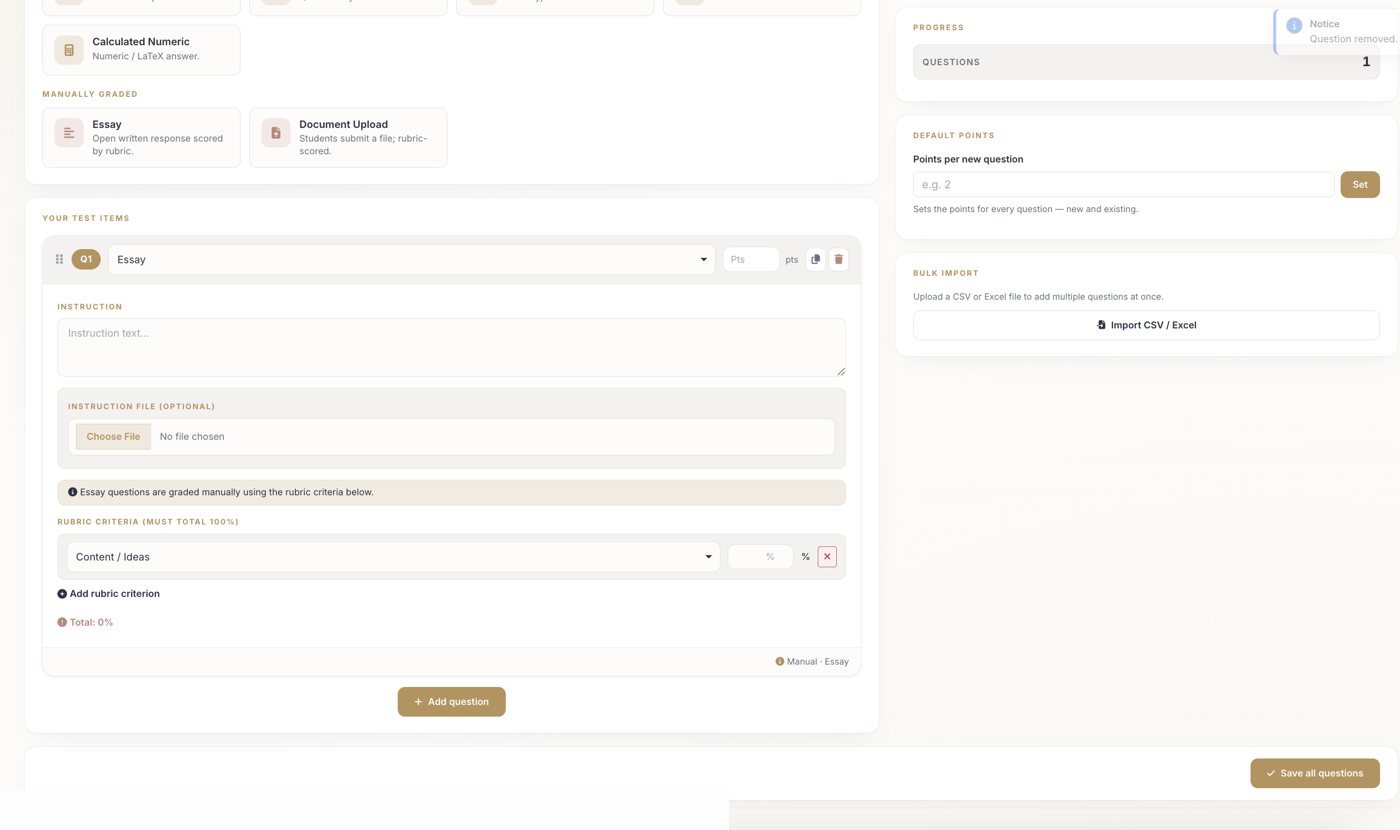
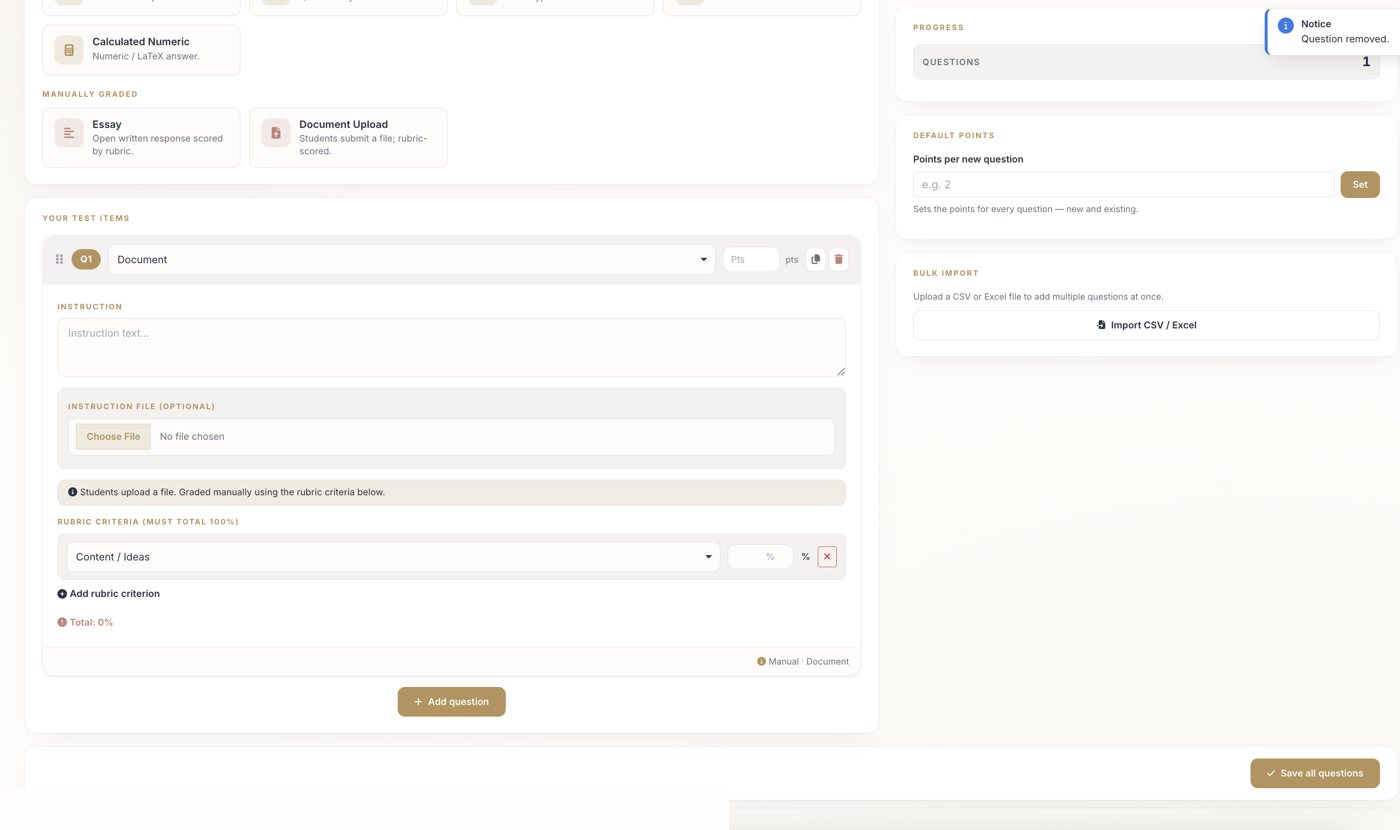
On the questions screen you can set default points, bulk-import, or click a question-type tile to begin writing items one by one.
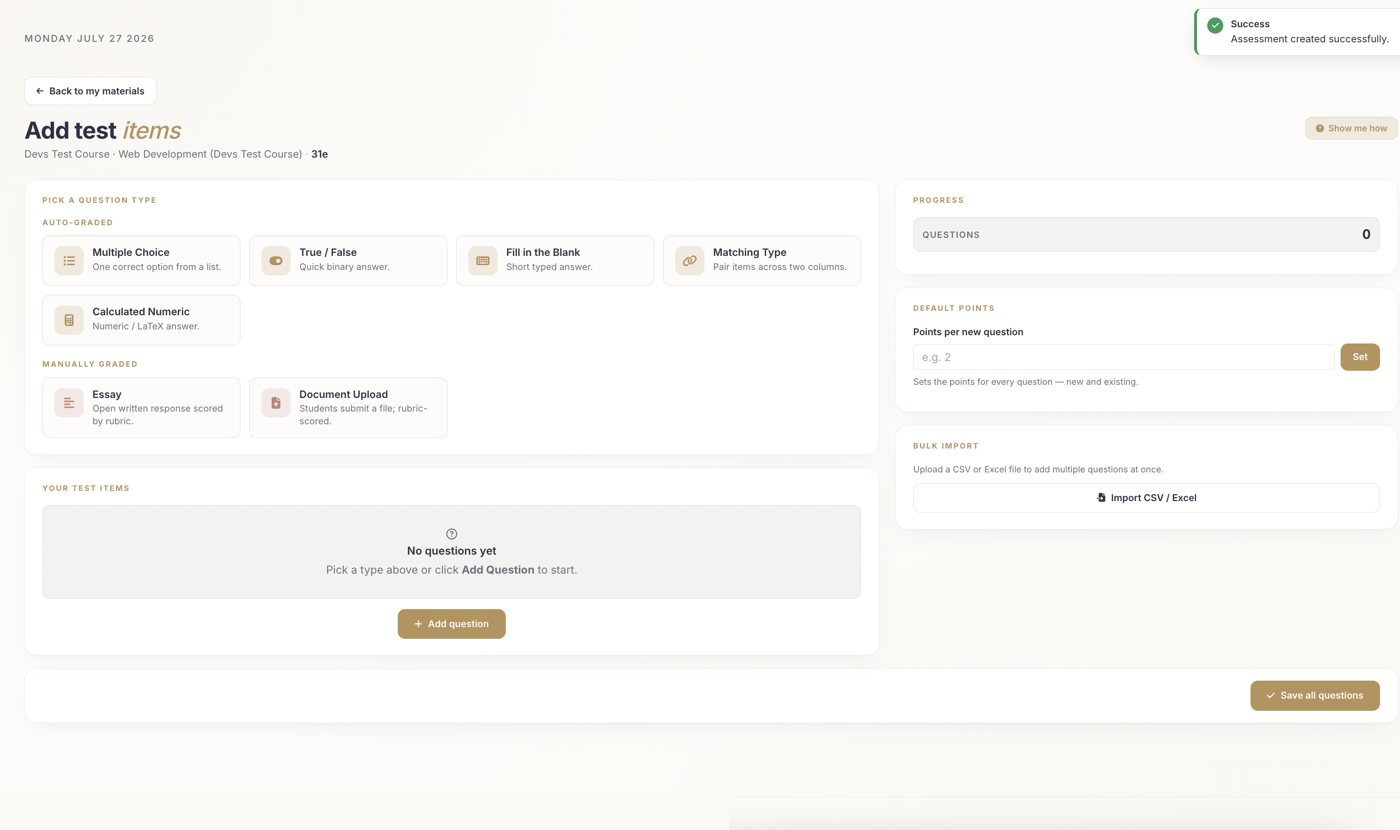
Which question types are graded automatically?
Auto-graded: Multiple Choice, True / False, Fill in the Blank, Matching Type, and Calculated Numeric.
Rubric-scored: Essay and Document Upload — for these, the rubric criteria must total 100%.
Can I import many questions at once?
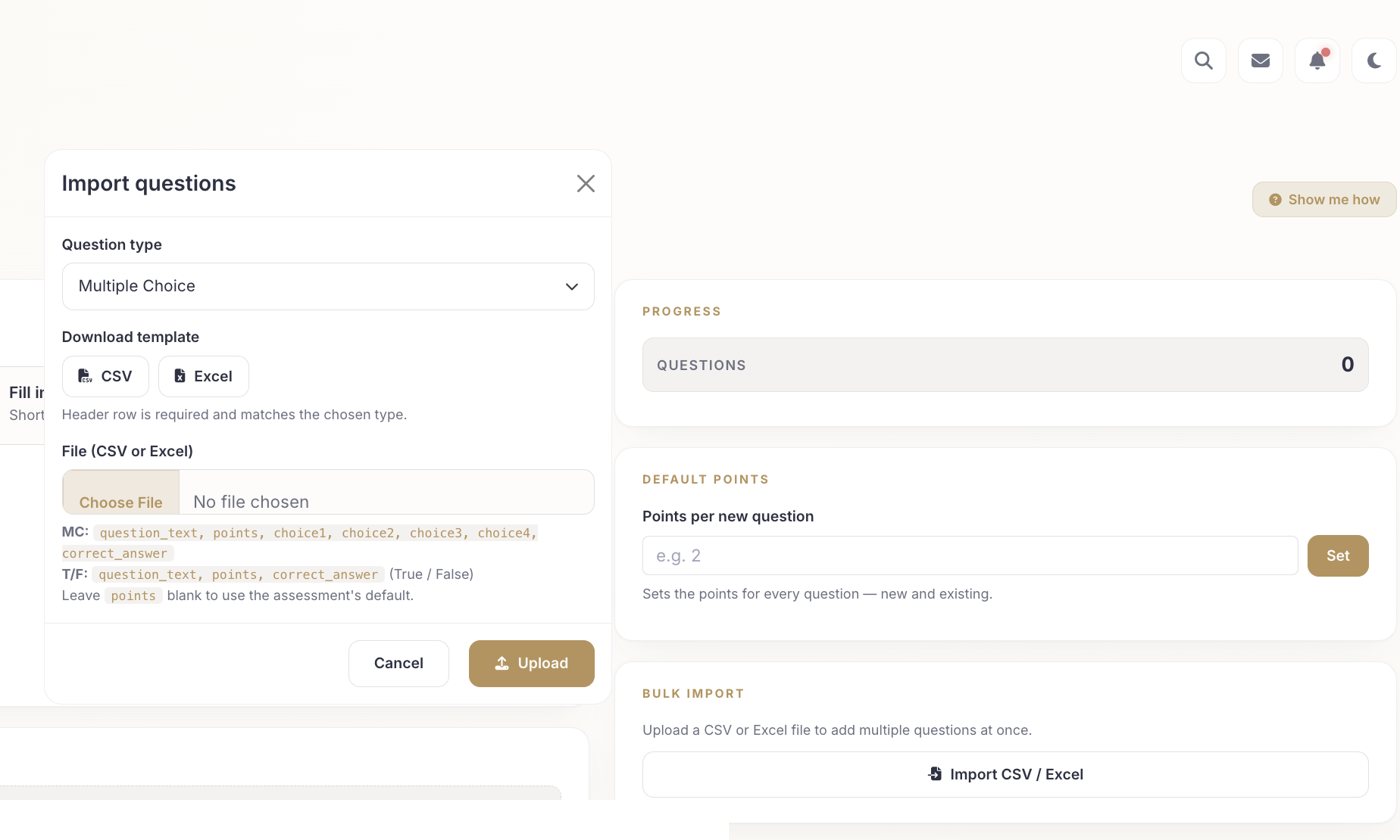
Yes. Under Bulk import, import a CSV or Excel file. Download the template first and fill it in following the header row — the columns depend on the question type — then upload it.
What's the difference between Draft, Scheduled and Published?
- Draft — saved but not visible to students yet; finish it later.
- Scheduled — appears automatically on its open date.
- Published — live now; students can see and work on it.
Can I reuse an assessment?
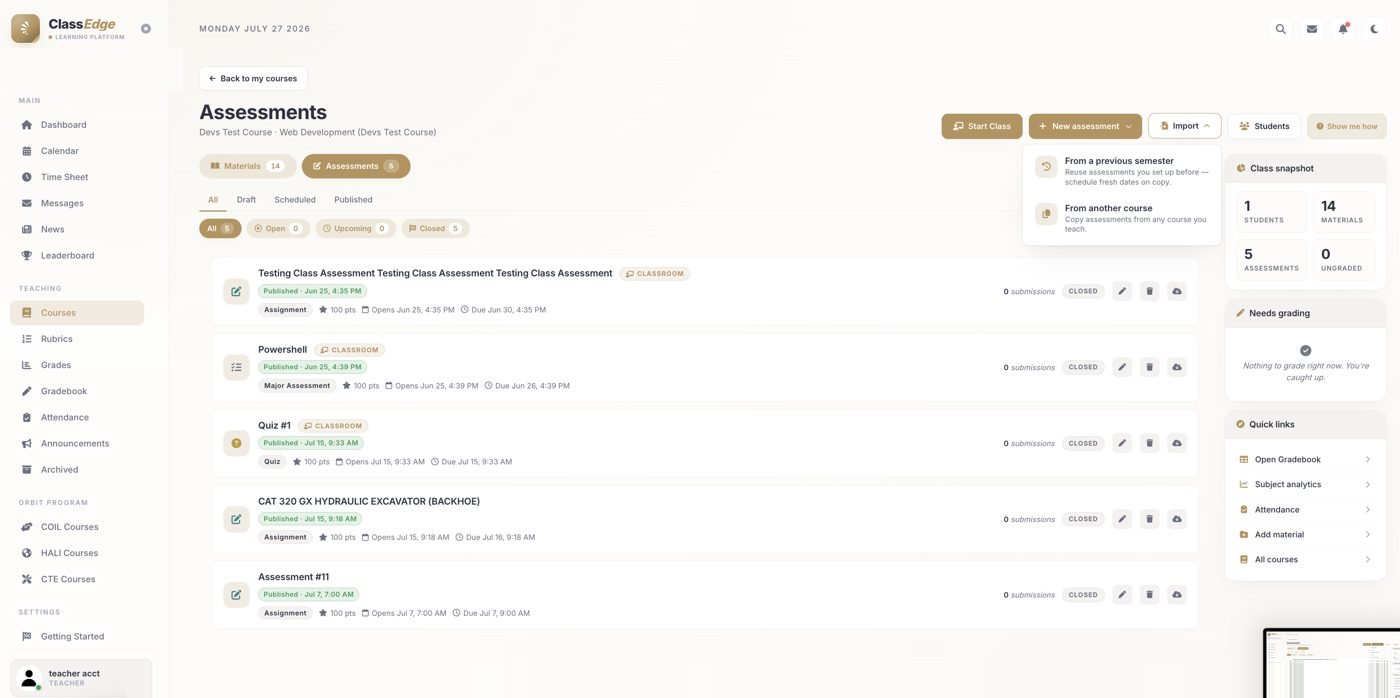
Yes — you'll rarely build from scratch. Click Import on the Assessments page to reuse one from a previous semester with fresh dates, or copy one from another course.
Rubrics
Reusable scoring guides
What are rubrics for?
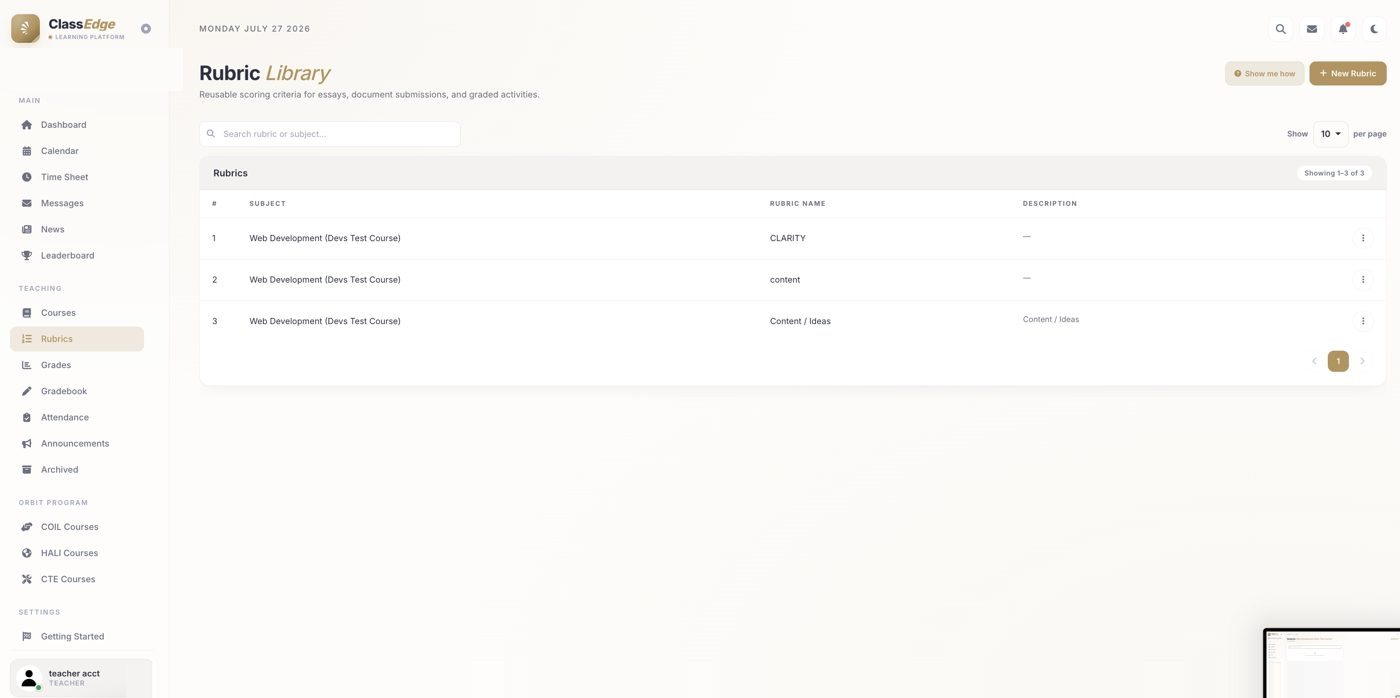
Rubrics are reusable scoring guides for essays, document uploads, and activities. They keep your scoring consistent from student to student.
How do I create a rubric?
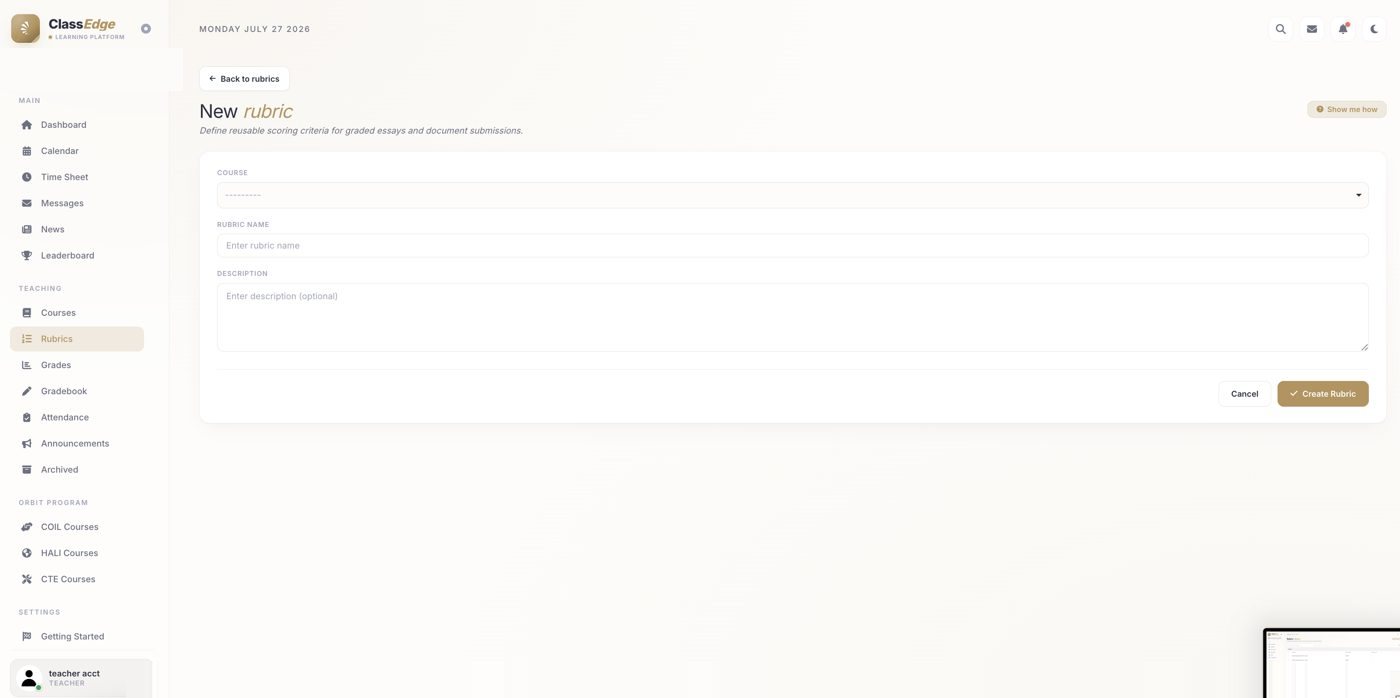
Open the Rubric Library — all your rubrics in one place, listed with their subject and name. Search to find one, or click “New Rubric”, choose the course, name it, add a description, then “Create Rubric.”
Grades
Term and final grades
What is the passing grade?
The passing grade is 75. A blank cell means the student has not been graded yet — it is not a zero.
How do I view my students' grades?
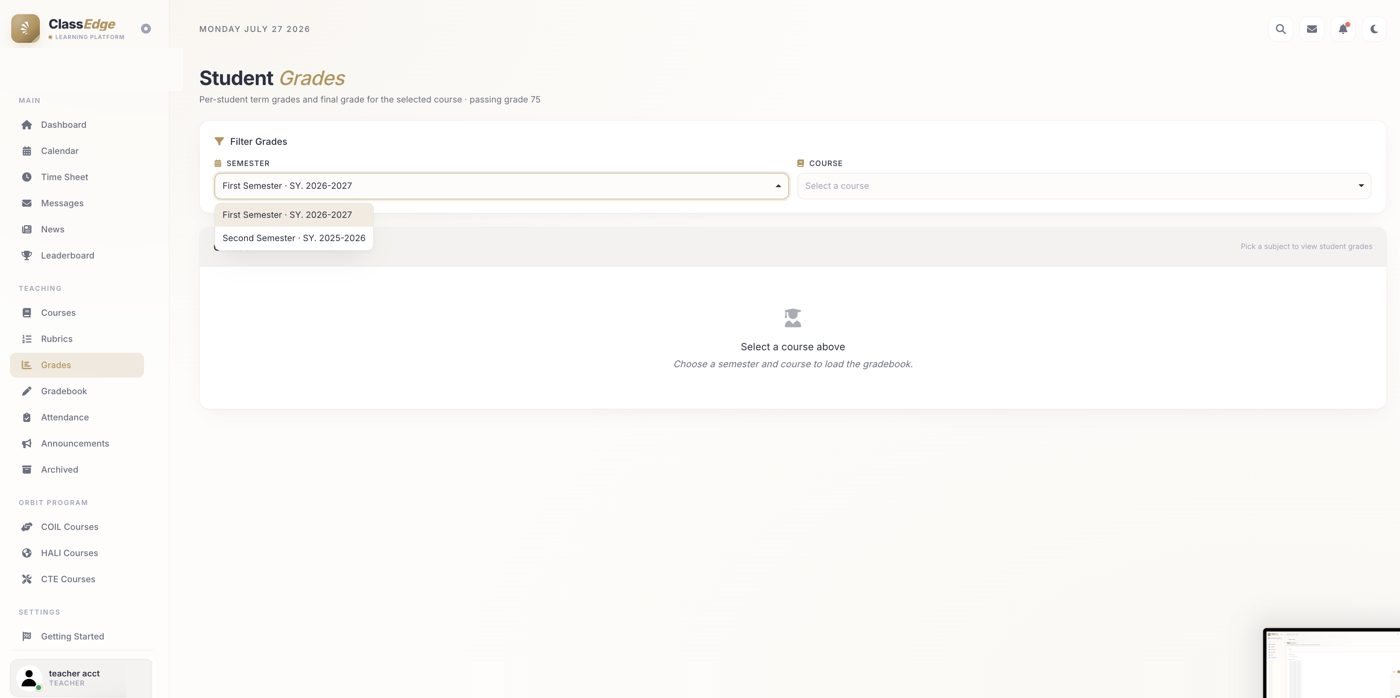
On the Grades page, pick a semester and course and the grades load below. The page reads from your Gradebook, so set up the Termbook and Gradebook first.
What does the everyday grading routine look like?
- Find work to grade — the “Needs grading” card on your Dashboard.
- Open the assessment — review each submission one by one.
- Score with a rubric — for essays and uploads, to stay consistent.
- Enter the score & feedback for each student.
- Save & release — scores flow into the Gradebook and the final grade.
Termbook & Gradebook
The heart of grading
What's the difference between the Termbook and the Gradebook?
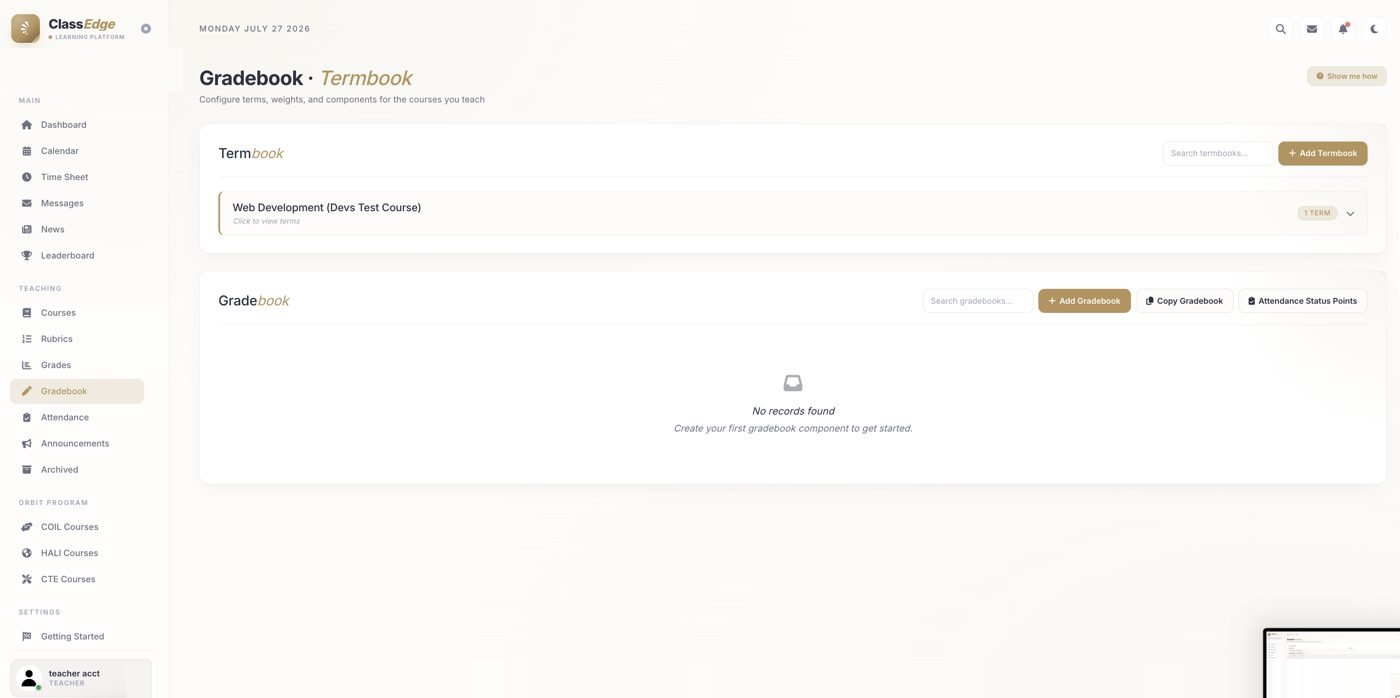
They are two parts of one page — the Termbook on top, Gradebook below. Set up the Termbook first, then the Gradebook.
How do I create a Termbook?
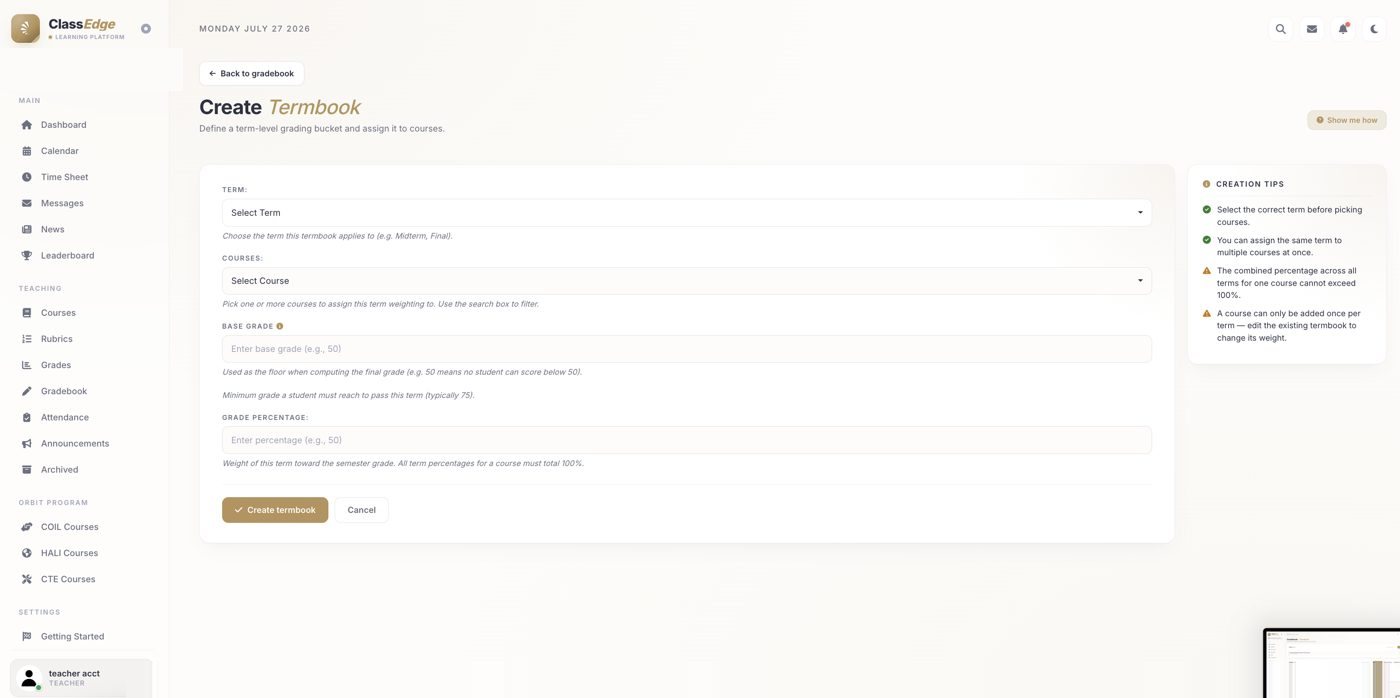
- Choose the term & course — you can assign to several courses at once.
- Set the Base Grade — a floor for the final grade.
- Set the Grade Percentage — how much this term is worth.
- Make all terms total 100% — for example, 30 + 30 + 40.
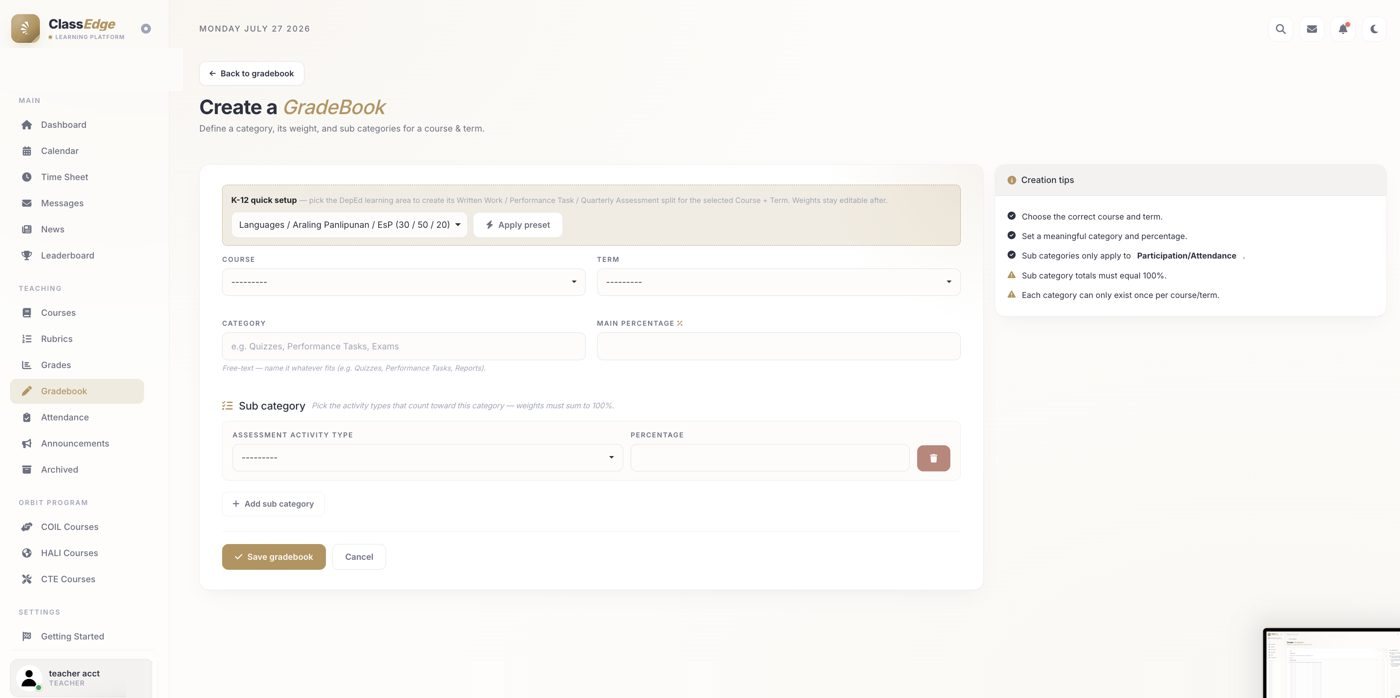
How do I set up the Gradebook?
- Choose the course & term.
- K-12 quick setup — apply the ready-made DepEd split, if it fits.
- Add categories & percentages — Quizzes, Performance Tasks, Exams…
- Make sub-categories total 100%, then Save gradebook.
A grading period or component is missing — what do I do?
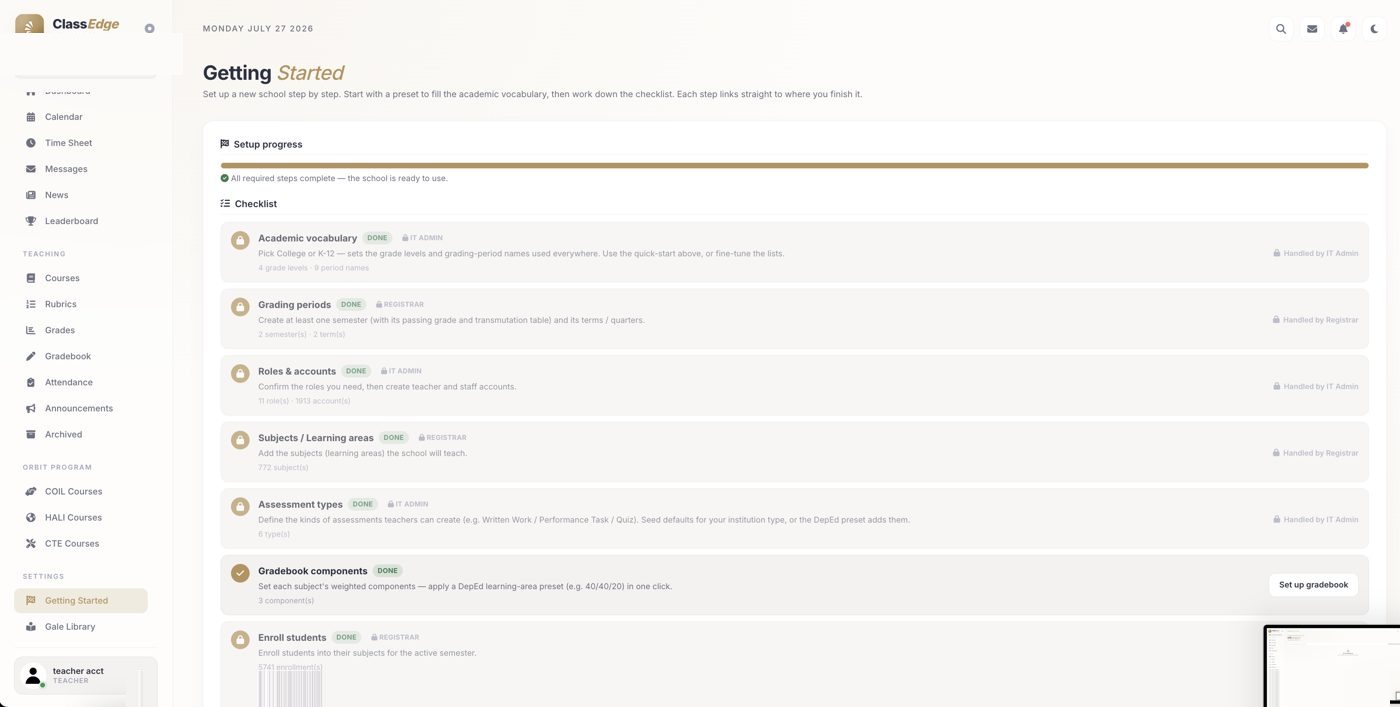
Some pieces are school-wide and are set by the IT Admin or Registrar. Check the Getting Started page (in Settings), which shows the school's grading periods and components — and if something is still missing, ask your admin.
Attendance
Who was present, late, excused or absent
How do I take attendance?
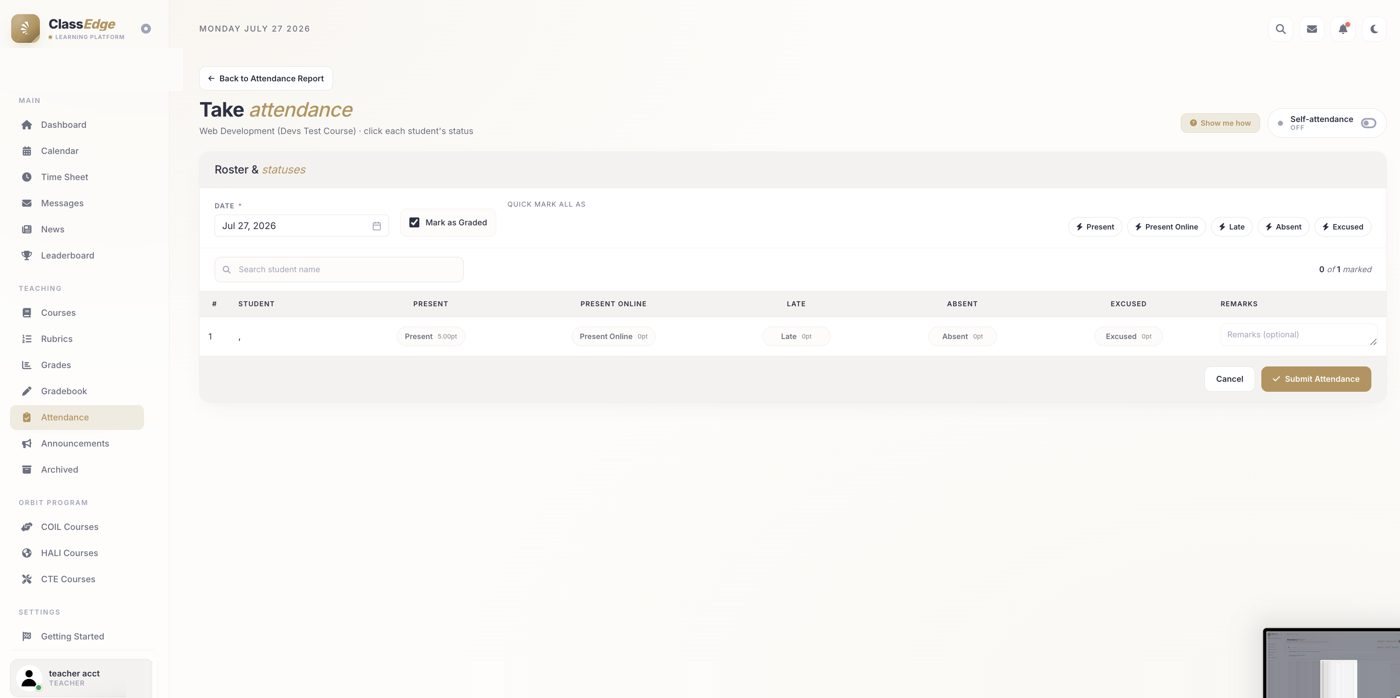
- Click “Take Attendance”, then choose the class.
- Mark each student — Present, Online, Late, Absent, or Excused.
- Use “Quick mark all as” to set everyone at once, then adjust individuals.
- Click Submit Attendance — it's saved to the class log.
Where do I see attendance reports?
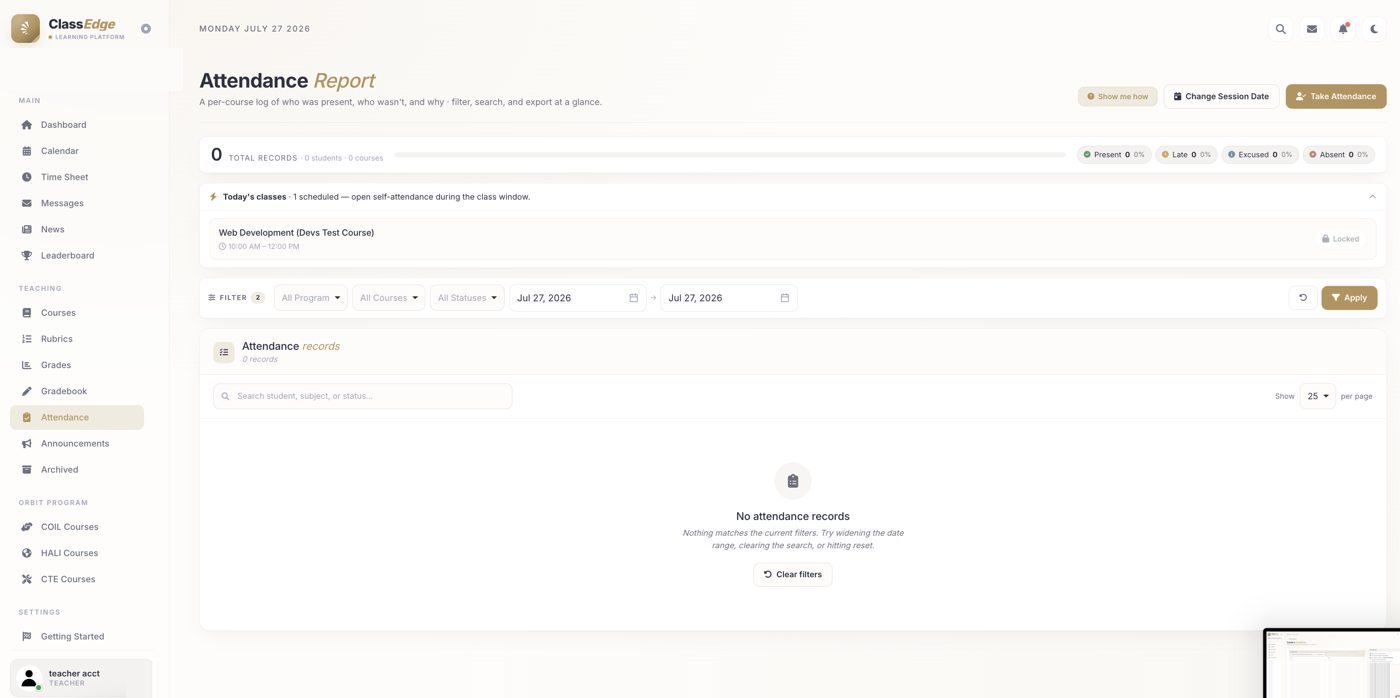
The Attendance Report shows totals at a glance — Present, Late, Excused, Absent — plus today's scheduled sessions. Filter by date, then click Apply.
Announcements
Posting updates to a class
How do I post an announcement?
On the Announcements page, choose the class, write a title and message, then Publish, Schedule, or Save as draft. Published announcements also appear in Campus News.
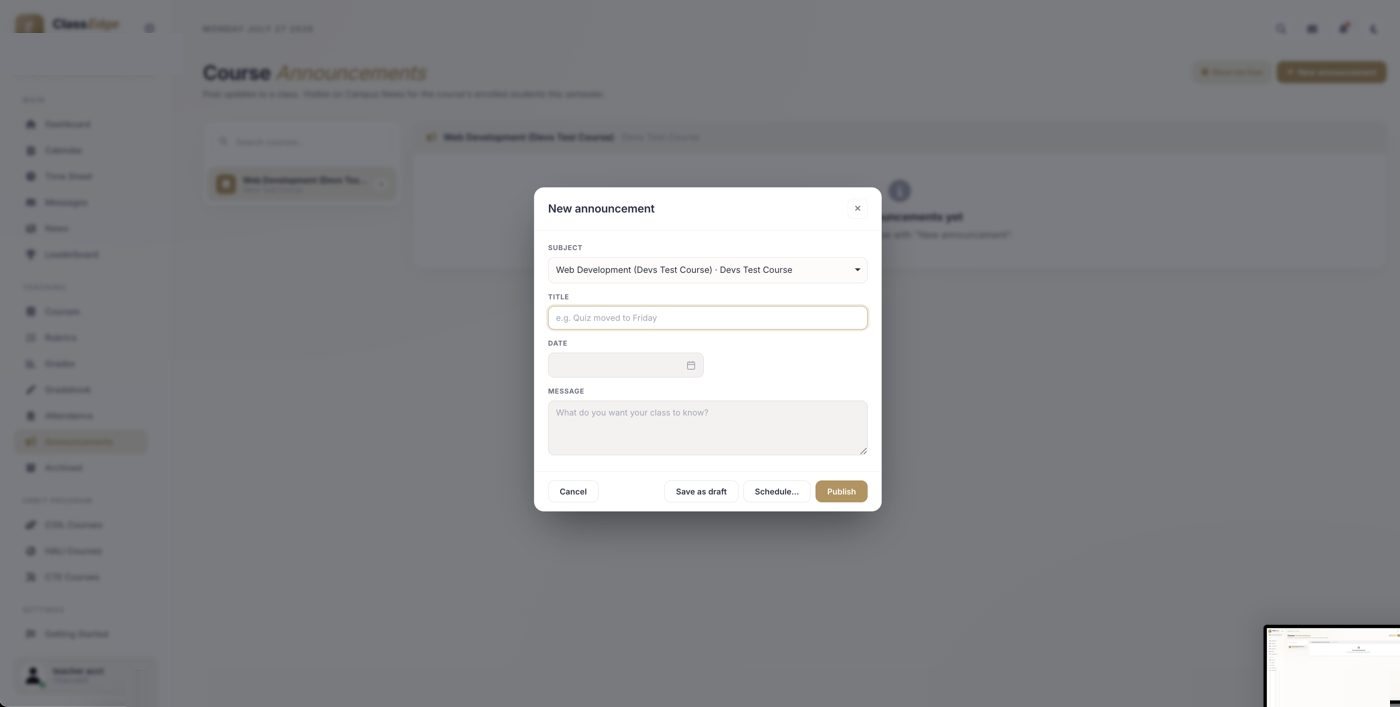
Why does a course say “No announcements yet”?
Pick a course on the left and its announcements show on the right — the page says “No announcements yet” until you post the first one.
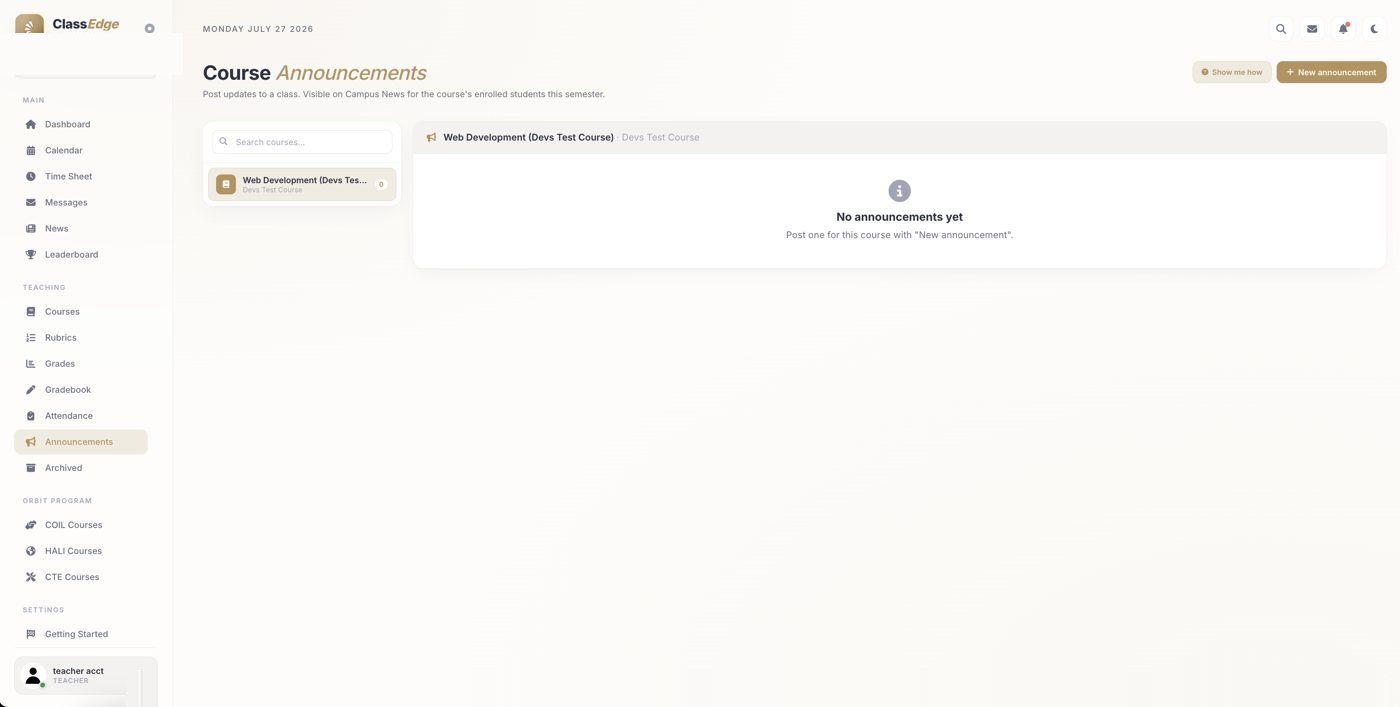
Orbit Program
COIL · HALI · CTE
What is the Orbit Program?
Three special course groups — COIL Courses, HALI Courses, and CTE Courses — that work just like your Courses page.
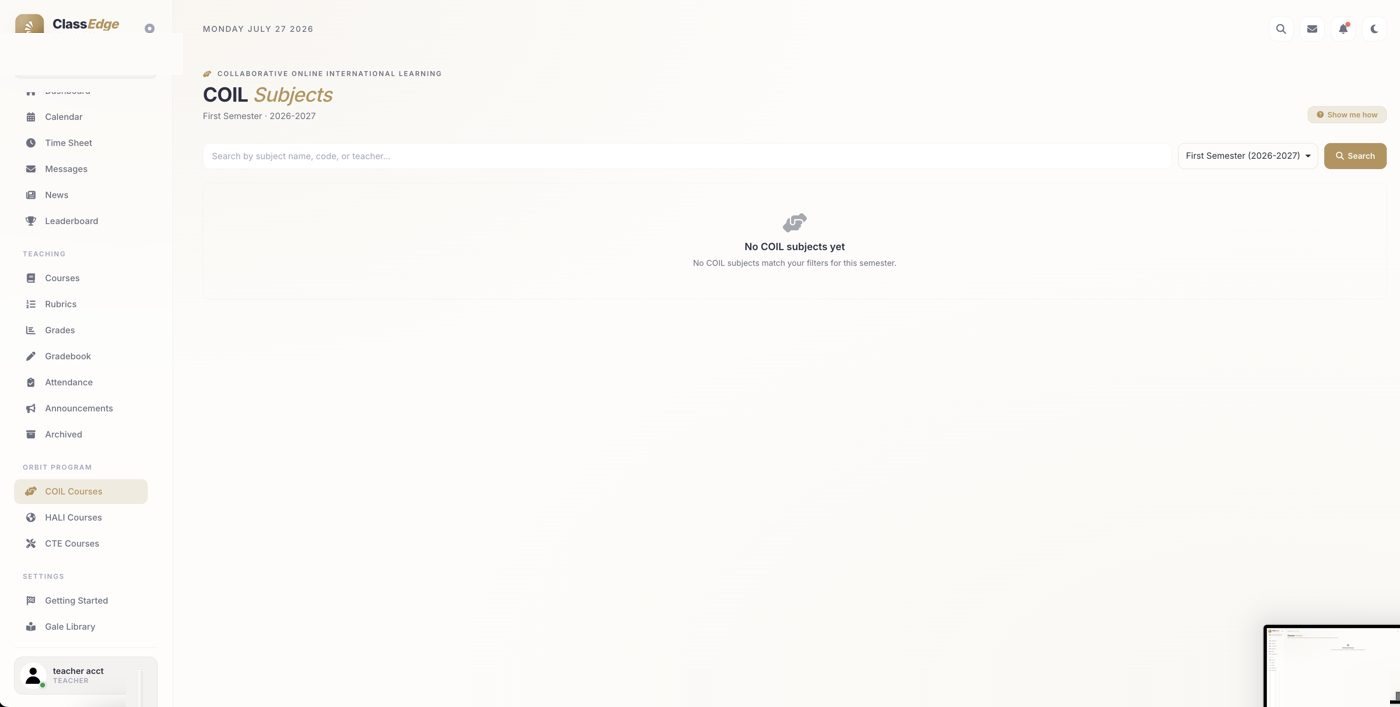
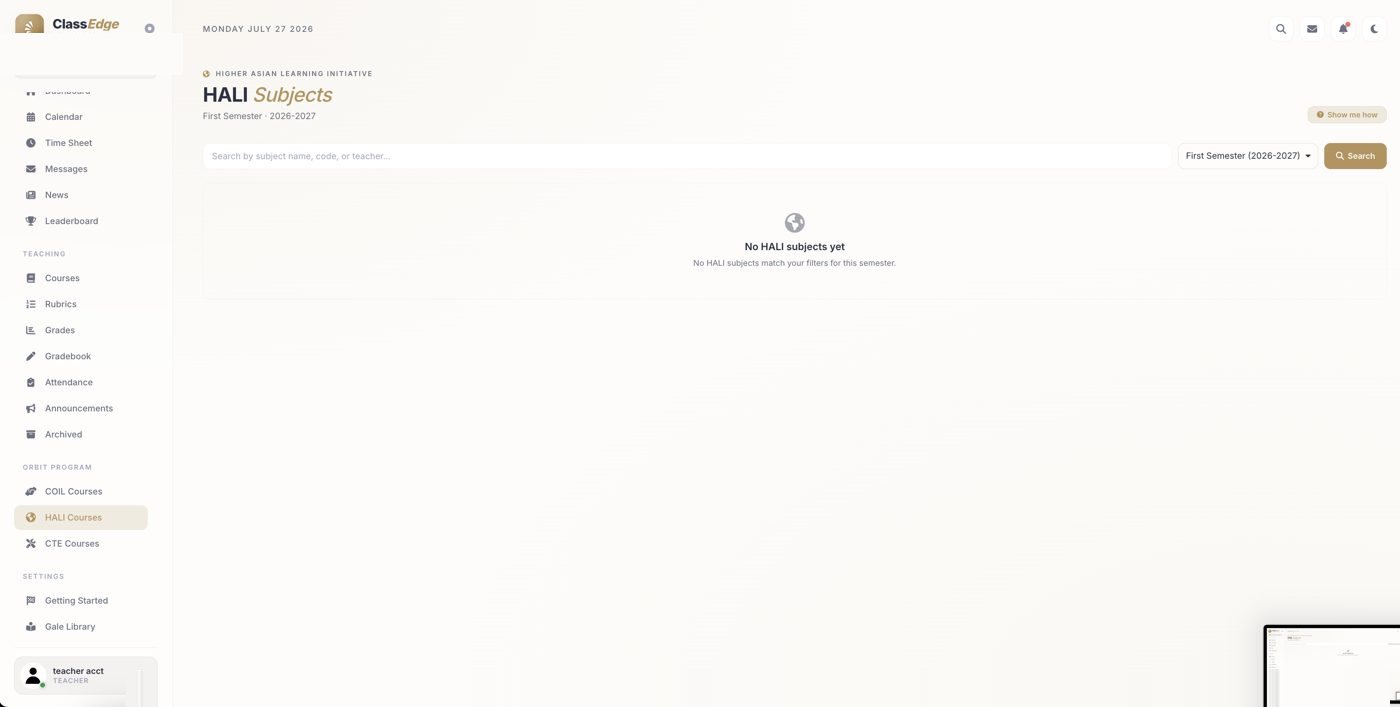
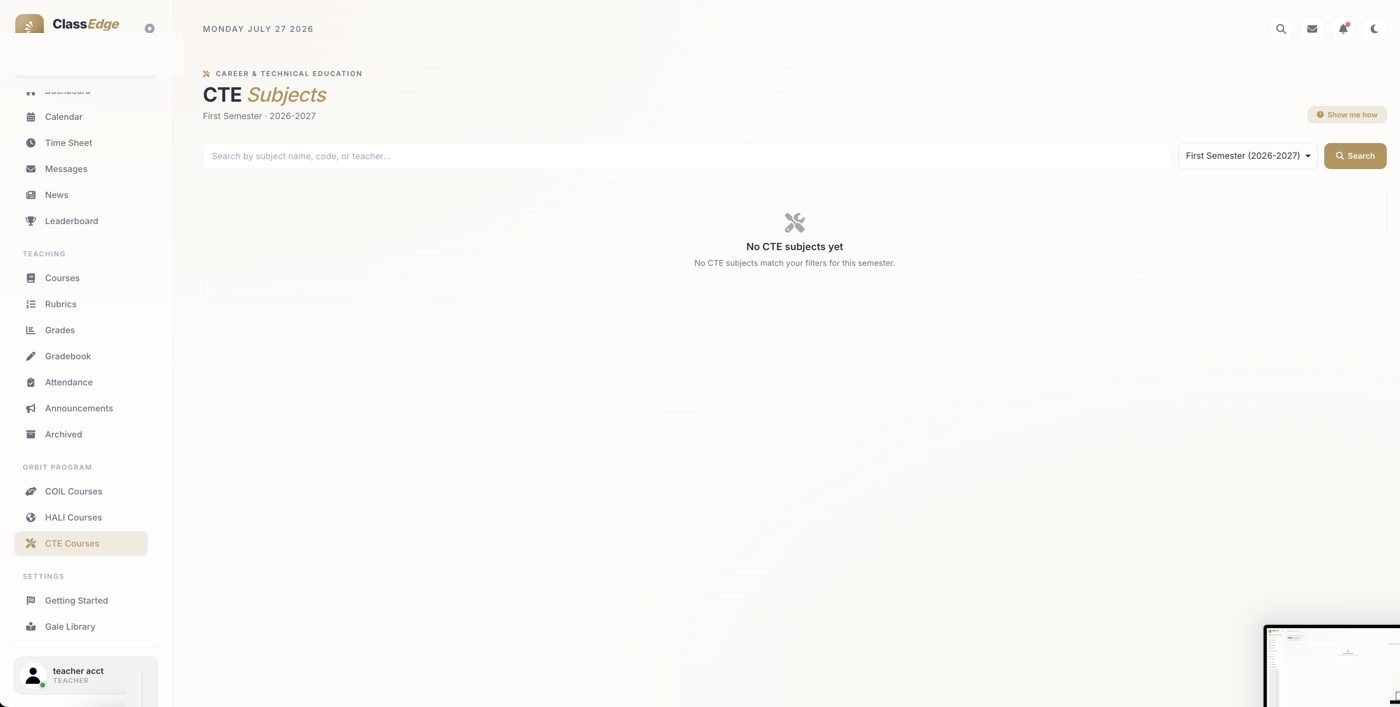
Why do the Orbit pages show no subjects?
If you don't teach in these programs, the pages simply show no subjects yet — nothing is wrong.
Archived · Settings · Library
Past classes and research databases
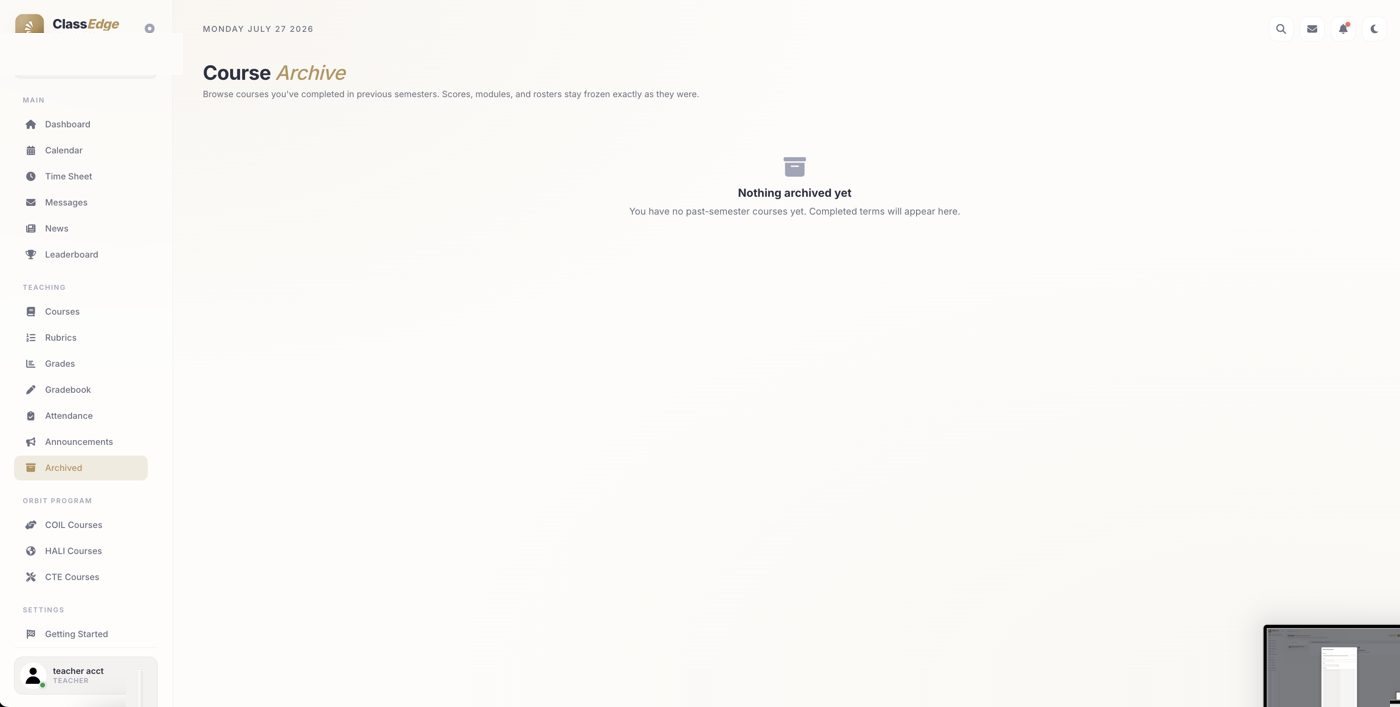
Where do my past-semester classes go?
To Archived courses — frozen exactly as they were, with scores, modules, and rosters kept, so you can look back any time. The page says “Nothing archived yet” until a semester finishes.
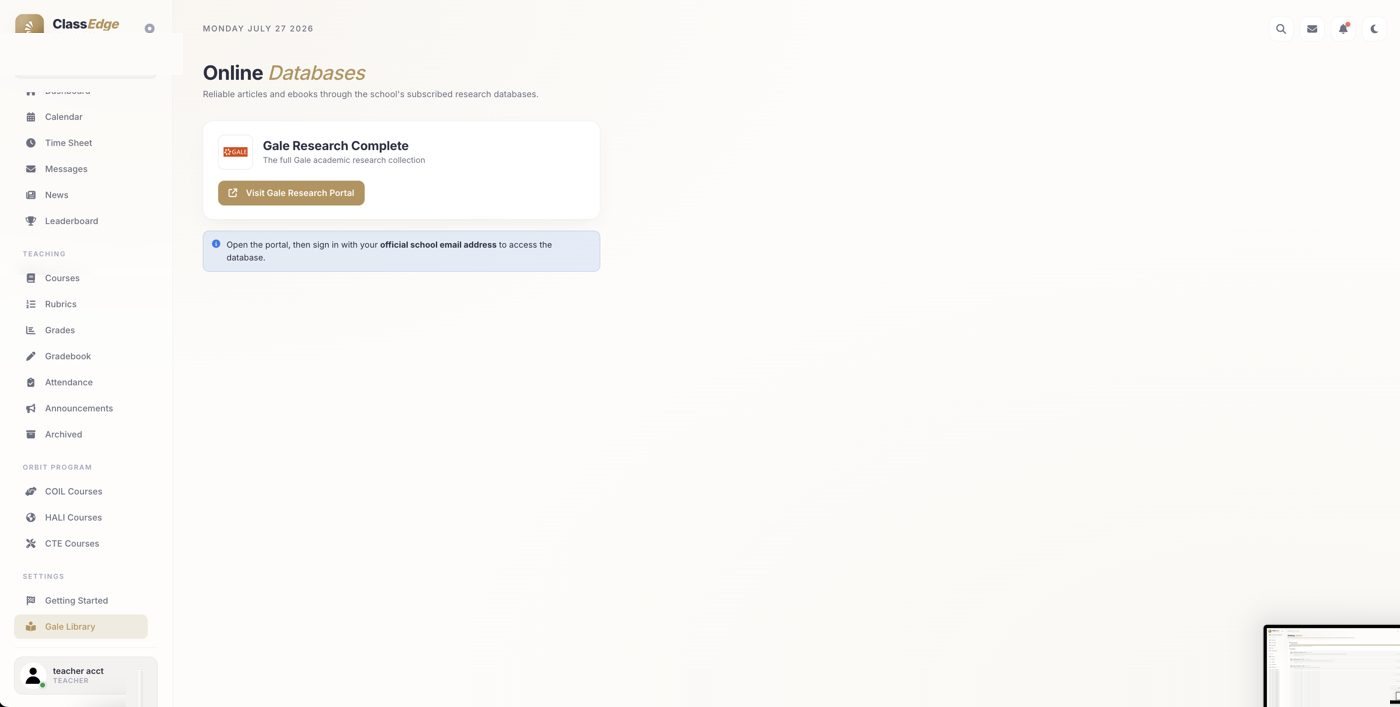
How do I access the Gale Library?
The school's research databases (Gale Research Complete) are under Gale Library. Click “Visit Gale Research Portal” and sign in with your school email.
What is the Getting Started page in Settings?
It's the school's setup checklist — it shows the school-wide grading periods and components configured by the IT Admin or Registrar.
Your Profile
Badges, points & details
What are impact points and badges?
Impact points and your rank are rewards for staying active; badges are encouragements, not requirements. Your profile also shows your student rating and personal info.
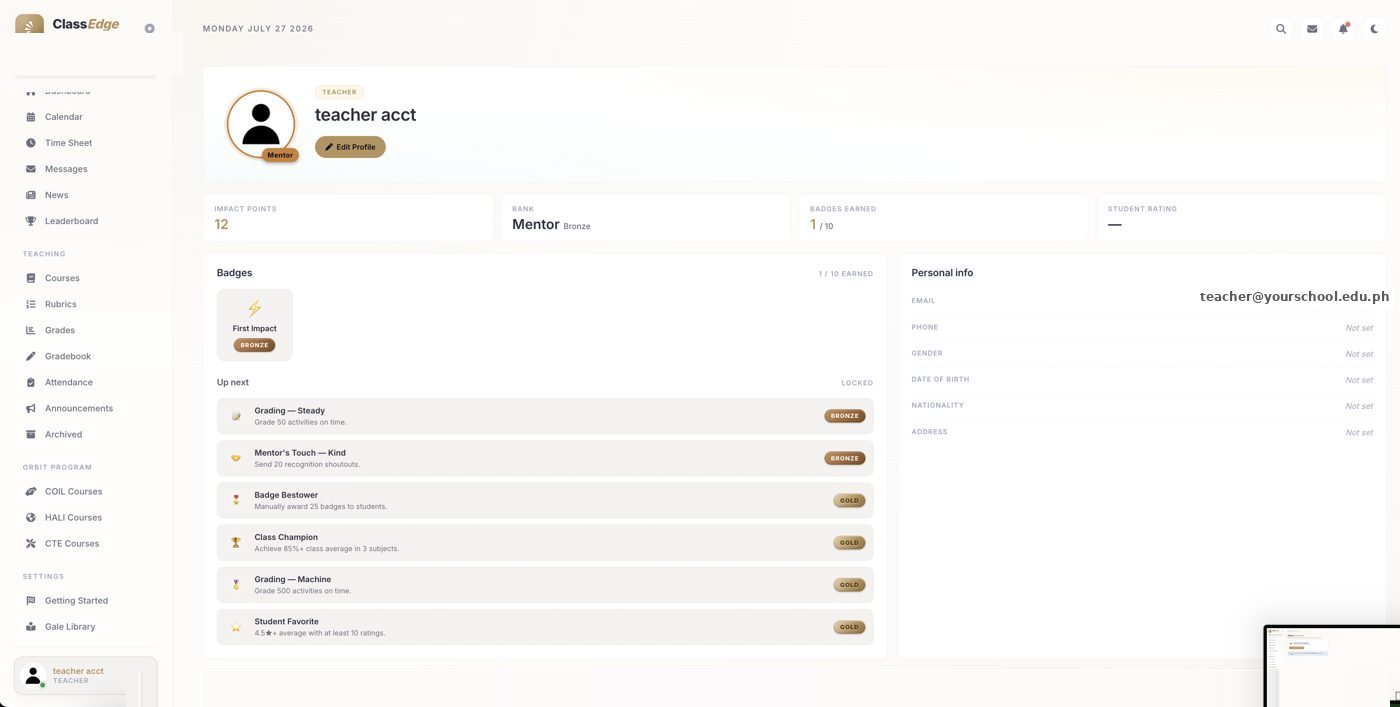
How do I update my details or photo?
Click Edit Profile on your profile page to update your details and photo.
Still stuck?
Full step-by-step details are in the ClassEdge Teacher Manual. And on any screen, click “Show me how” (top-right) for a guided, click-by-click walkthrough built right into ClassEdge.